Kids Art: Painting Fun with Monoprinting
Most days I hate having a glass tabletop as it is a nightmare to get (and keep) clean with a toddler in the house. It is however perfect for making monoprints.
We used child friendly acrylic paint straight onto the tabletop to make these prints. If you don’t have a glass table, try a smooth plastic placemat, lino offcut or plastic tabletop (I wouldn’t advise trying this activity on any precious tabletop as the pigment of some paints may stain).
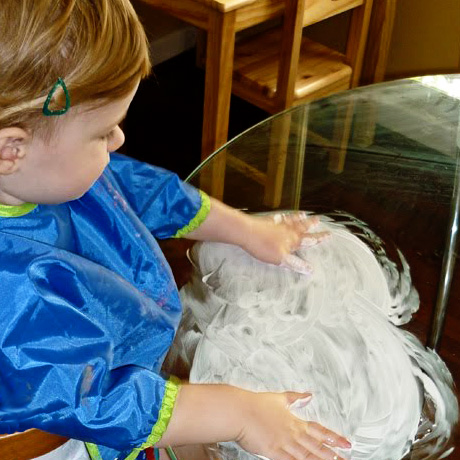
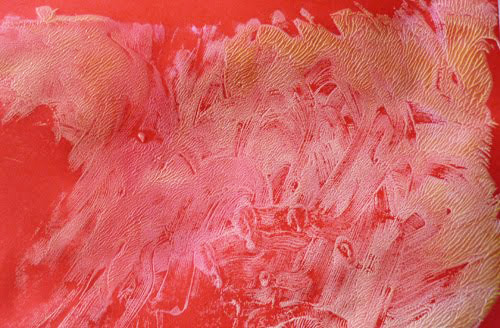
I deliberately started off with just white paint. Children don’t always need colour to explore artmaking. Immy spread the paint out, enjoying the sensory feel of the paint on her hands and between her fingers. She used her fingers to make marks in the paint surface.
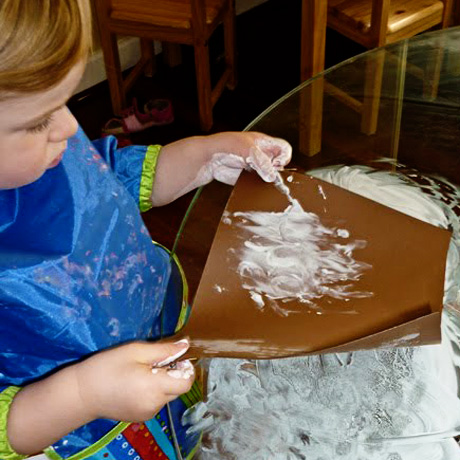
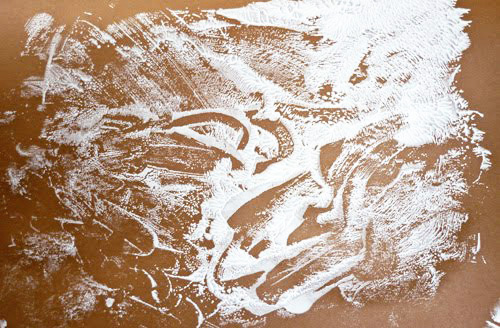
Then it was time to make our first print. Place your paper onto the painted surface and smooth down. Lift up for the magical reveal…

Next I added a few blobs of red paint. Immy continued to smooth the paint with her hands, commenting that it was making pink. She really enjoyed the process of mixing in each of the new paint colours as I added one at a time and was really interested in the change of colour throughout the whole process.
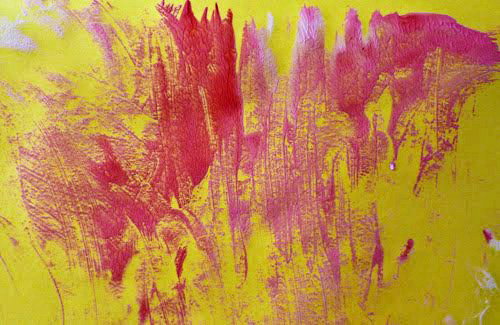
Next we added yellow.
The last colour added was blue.
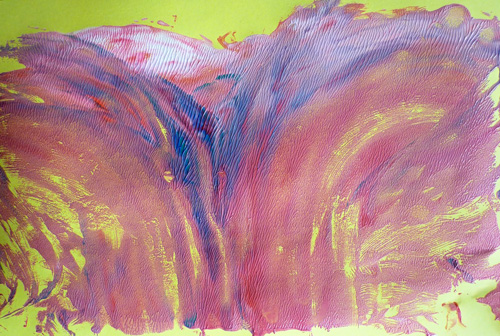
I love this print, made shortly after a few spots of blue were added. You don’t need to add a lot of each colour all at once, little by little produces beautiful effects and extends the creative process with your child.
As they ‘work,’ talk with your child about their artmaking;
- Give acknowledgment – say what you see: “I see you are making marks with your fingers in the paint.”
- Ask divergent questions that encourage thinking in many different directions and reveal how the child is thinking about the problem, “What ideas did you have when you made these shapes?” “What would you like to say about your artwork?”
- Encourage children to reflect on their art experiences, “Which picture did you work on the hardest” “Which part of your print do you like the best?”
- Label the child’s action, “You are pouring blue paint into red paint. What colour did you make?”
- Encourage children to talk together about their art and art experience. Encourage children to describe the processes used to create a product
I am guessing that this activity will challenge the mess-o-meter of some Mums and I understand that completely. Surprisingly, it only took two damp flannel facecloths to clean up both my child and my table, so there is really no excuse not to give it a try!
Related Posts
- Nurturing Creativity
- Painting Round and Round
- The Case for NOT Packing Away!
We love messy finger painting here!
And as you suggested it's great for colour mixing.
I have never tried this at home, but I know my kids would love it. I still have a week left of school hols, I will try and fit it in!
Love the new header – great shot of Immy.
I can't believe I never thought to offer one color at a time! I've always offered a palette (usually a plastic plate we use just for painting) and then watched it immediately turn into brown/black as they mix all the colors on the paper. I really love the idea of letting her mess with a light color, then add other colors one at a time to see the changes. Much better than a dark mess all at once! 🙂