Project Teepee: A DIY Project the Kids Will Love
Time for a picnic, a game of cowboys and Indians, a cosy place to sit and read, camping by torchlight, a tea party with friends or a rocket ship shooting to the stars.
Your very own Project Teepee will become all these and more. From the bedroom to the backyard, whatever type of imaginative play your child enjoys, they will love this simple to sew teepee.
Why pay over $200 for the shop bought version when you can easily make your own?
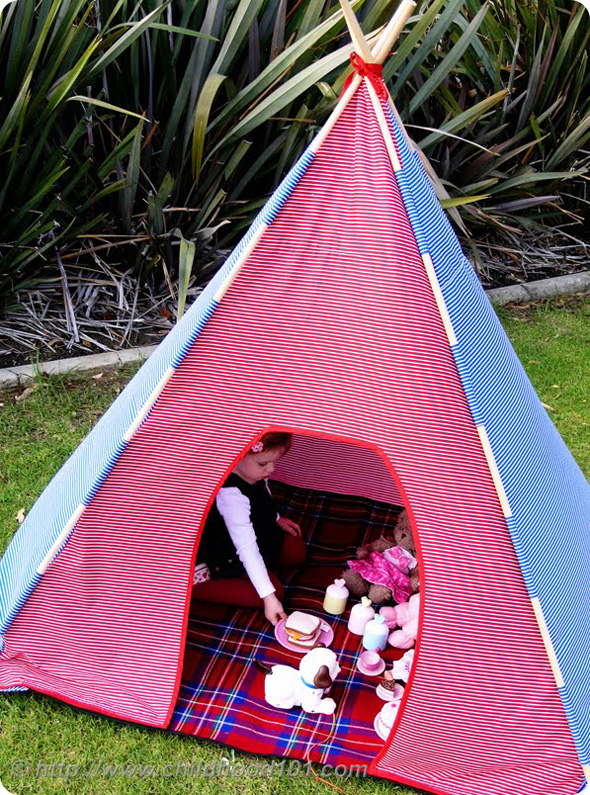
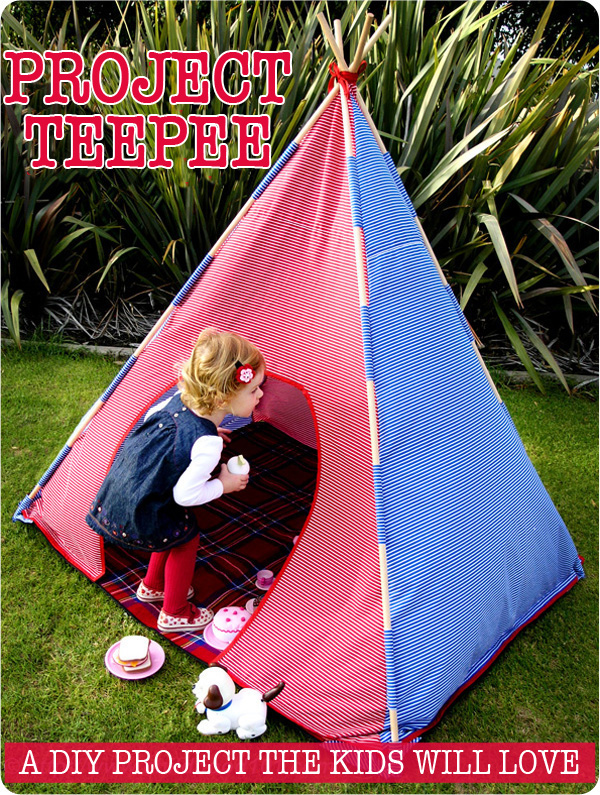
Measuring 120x150cms and 150cm high, the use of a plastic backed picnic mat for the base makes it practical for both indoor and outdoor use. Quick and easy to make, the completed teepee assembles in minutes and is easy to pack away and store. I am most definitely a ‘beginner’ sewer, I say that I can only sew in straight lines! Fortunately, straight lines are all you’ll need for this simple, DIY kids teepee.
Purchase your very own Project teepee downloadable instruction booklet today for just $5

Suitable for the beginning sewer, the 17 page PDF instruction book is very detail-oriented, sharing everything you need to know to make your very own teepee, including step-by-step instructions and photographs, pattern pieces and a bonus four page easy-print instruction summary. All of which can be easily downloaded immediately following purchase. Included in the booklet are;
- Easy-to-follow instructions, perfect for the beginner to intermediate sewer
- Full pattern making instructions
- Instructions for adapting the size of your teepee
- Alternative style options for the teepee doorway
A link to the downloadable PDF document will be emailed to you once payment has been made.
Project Teepee © 2010 Christie Burnett, Childhood 101. All rights Reserved. Reproduction not permitted.
Congratulations Christie – what an awesome teepee! I can't believe you are selling the pattern at such a great price. You are all kinds of fabulous. Cath.
Goodness, this is awesome. I can't believe you made it. It looks amazing!!!! I don't own a sewing maching (yet) so I won't be able to put it together but I'll share it on my page. You are a FunMum!!!
The TeePee looks gorgeous Christie! You are very clever!
This is completely brilliant Christie! Like it wasn't going to be!!!!
Looks great. I can't believe you made that! By the way, Immy is so cute. She reminds me a lot of my daughter, who is only a couple of months younger. I love this age!
Brilliant! Must blog about this!
Oh, that looks so cute!
Fantastic work Christie – the TeePee looks awesome – can't believe you made it – A job well done! :o)
what an awesome idea Christie.
great price? the material and supplies will cost lots!
Thanks everyone, it really is easy to make.
Judy, the materials cost me about $40-45 to make, considering you pay $200+ retail to buy a similar product, I think the price is just right.
I really love the teepee! I have been wanting to make one for my little guy. Maybe I should try to make one some time. 🙂 It is so cuteeeee!
http://itssewtasticmama.blogspot.com/2010/04/green-bag-ladys-40th-earth-day-freebie.html
I am a new follower of your blog. 🙂
I always find your blogs interesting and this one is no exception. I would like to give my daughter a teepee for her next biirthday and this is great!
awesome I have been wanting to either buy or make one of these. Thank you for sharing I will buy a pattern for sure.
This is so cute. I love it. When I made one, I made it with doors that had flaps and you can pull them back, which is also really cute. I also found that putting a bead between each pole really helped it sit nicely and open properly.