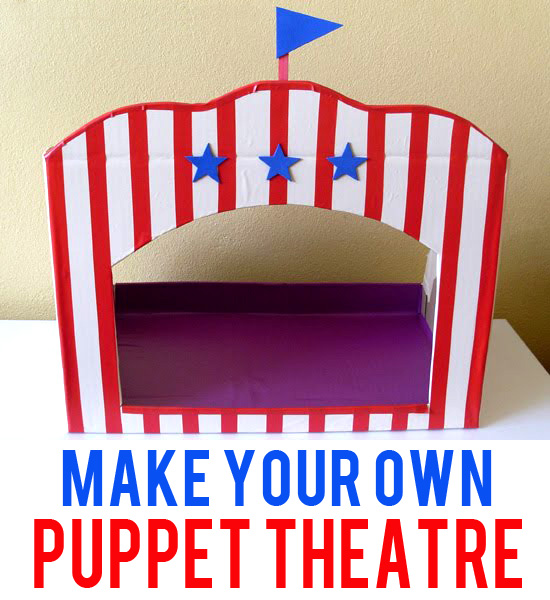
DIY Kids: Tabletop Puppet Theatre for under $5
For our third DIY Kids project, I decided to make a gift for a very special 4 year old. I also thought that it would be helpful for readers of Childhood 101 who have older children to share a project suitable for pre-schoolers or kindergarten aged children. So without further ado, here is the…
You will need:
- One medium sized box, I used a book packing box
- Clear craft glue
- Utility knife
- Self adhesive book colouring in your chosen colours
- Thin electrical tape
- One sheet of craft foam
- One popstick
- Double sided tape
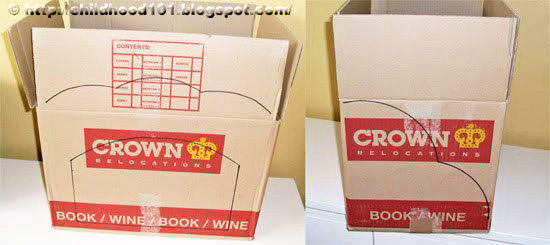
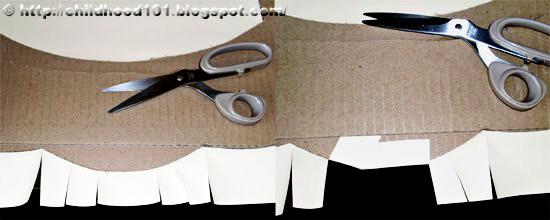
1. First, mark the shape that you would like your puppet theatre to be. I am thinking circus-inspired and went for curves, tracing around dinner plates to make these shapes.
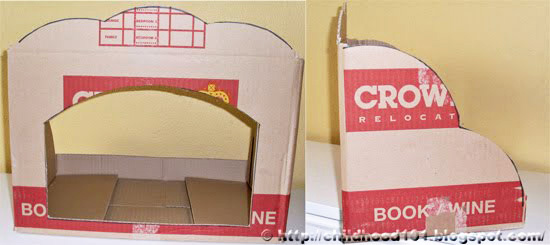
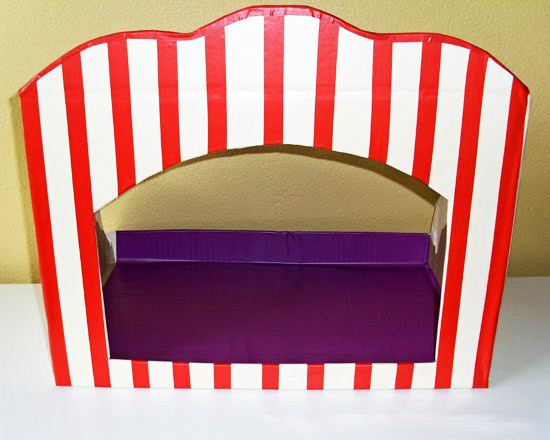
2. Use a utility knife to cut along your marked lines. I cut the front and both sides and left a small lip along the back to stop the box from collapsing.
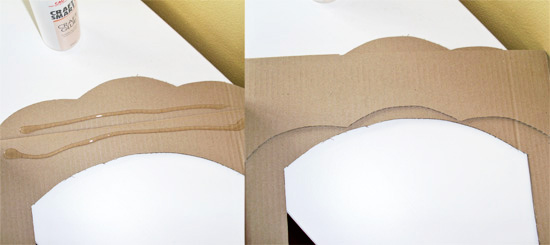
3. As my design went above the fold at the top of the box, I used an offcut to reinforce the fold, gluing it into place with some craft glue and trimming off the excess cardboard.
4. As with the kitchen and car projects, I am choosing to use self adhesive book covering instead of paint to decorate the puppet theatre. I lay the book covering out, securing it at the far end with a weight and removed one section of the cover paper at a time so that I could cover one end, then the front, and finally the second end. As you go, smooth the book covering down, pushing any bubbles to the edge. Fold book covering tightly over all straight edges
5. To fold the book covering neatly over the curved edges, make small cuts every two centimetres or so and then fold each section tightly over.
6. Slit the book covering across the centre opening, trim excess and again make small cuts and fold the book covering tightly back.
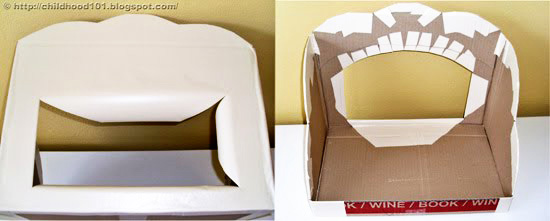
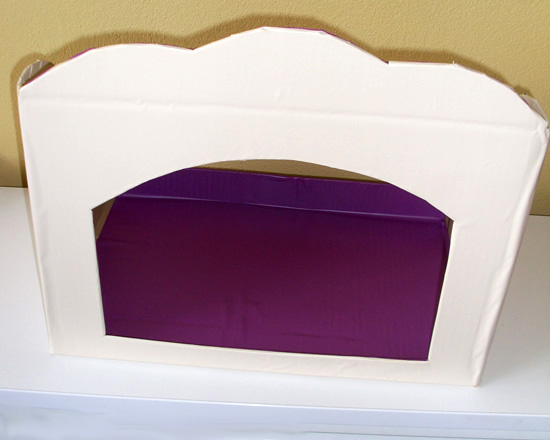
7. To make the inside neat and tidy, I covered the stage area with a contrasting coloured book covering.
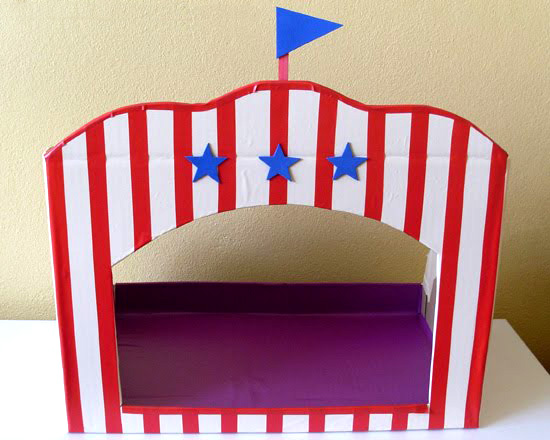
8. Now for the fun part, decorating! As I was trying for a circus tent look, I used thin, red electrical tape to make stripes. This tape came in a pack, two rolls each of four colours for $2 from the $2 shop.
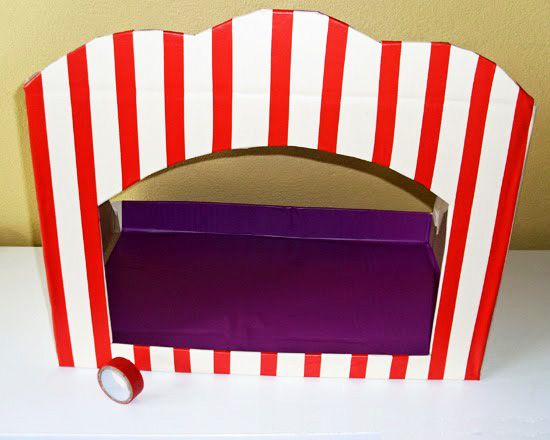
I finished the top off neatly with a strip of the red tape too.
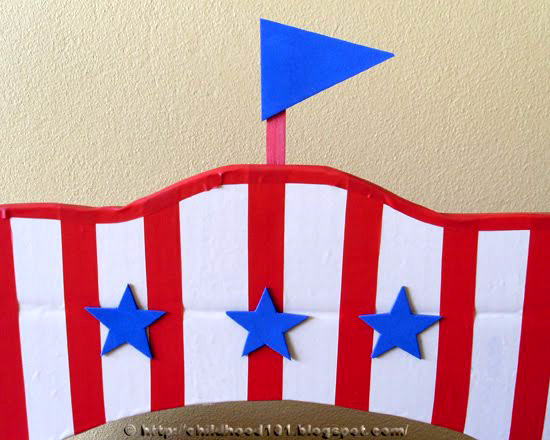
9. A few more decorative touches – three stars and a flag cut from craft foam. The flag was secured to a popstick with double sided tape. Attach the stars and flag to the box with double sided tape.
And voila, a circus-inspired table top puppet theatre.
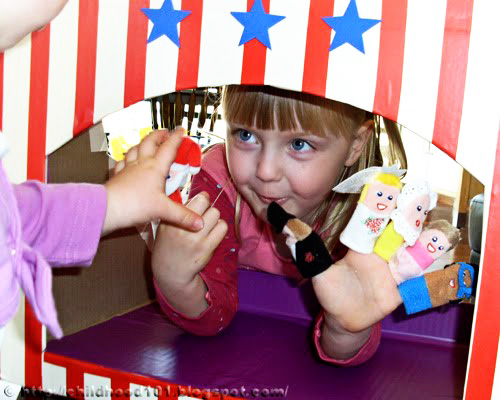
Put to the test by a very happy four year old
How much did it cost?
– $0.00 Box (I love recycling and repurposing)
– $1.99 Self adhesive book covering (on special at Kmart)
– $0.25 Contrast tape ($2 for pack of 8)
– $0.25 Craft foam
– $0.10 Popstick (probably less as I bought a huge bag for $2)
– $1.00 Double sided tape and craft glue (from our stash)
– $3.59 TOTAL, that’s under $5 for hours and hours of fun!
Puppet shows are a wonderful way to extend a child’s communication skills. As children assume different voices and take on the different personas of the puppets, they are experimenting with language without even realising it. With puppets, children often play out what they have seen, heard and learnt, reinforcing their knowledge of the world around them. Their imagination is also put to good use as they make up stories to share.
Puppets help to build social awareness as children learn to take turns and to listen to each other’s ideas. They are also great for building self esteem and confidence and when I was teaching I saw more than one very shy, quiet child take on much bigger, louder personality from behind the safe zone of a puppet!
Related Posts
Love your work Christie… xx
Christie you are really just amazing. I am so proud to have such a clever granddaughter.
Anna loves her theater too and actively participated in making one. I wrote about ours in my old post – http://learningwithmouse.blogspot.com/2009/06/making-of-theater.html
Thank you for stopping by my blog. I love this theatre! THis is definitely a project I'm going to add to my very long to-do list 😀 thanks for the tutorial!
Hi Christie
Thank you for sharing such a great tutorial. My little girl would absolutely love this circus themed puppet theatre. I know what I will be using our next big box for.
Oh WAY cool!
My girls want me to make on for them.. despite the fact that they already have a lovely wooden version!
Hi… I just vote for ur blog.
plz visit and support my blog too
http://faizalhazri.blogspot.com
This looks great Christie. I love how your grandmother has left a comment on you blog – v. cool!
So great!
How fun is this?? I've added it to my DIY Theaters and Sock Puppets roundup today. Thanks for sharing!
http://www.cheepideas.com
Your page is so perfect. I love all the how to’s and the pictures and everything about it. You are great!!
Great idea. I’m going to make this
Thank you so much for saying so, Sue 🙂
Hi, what age range would you recommend this activity?