3 Fun Easter Hat Parade Ideas
In this post regular contributor, Ali of At Home with Ali, shares three fun and unique DIY Easter hat ideas. Get ready for your Easter hat parade!

This year is whizzing by… I can’t believe Easter will be here before we know it! If your school is like ours you will have an Easter Hat parade on your calendar. To help you get prepared I have three Easter hat ideas for you plus a bunch of bonus ideas in the links at the bottom of the post. I hope you find some inspiration here for a spectacular Easter hat for your kids.
HAT 1: Carrot Head
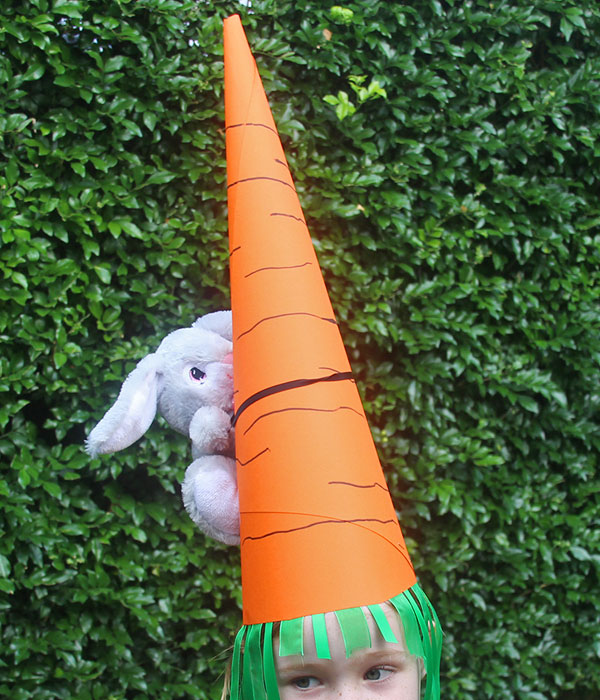
My 6 year old loves this hat, she thinks it is hilarious and enjoyed helping make it.
Materials
- Large piece of orange card (I used Canson card from my local newsagent)
- Green ribbon or streamers
- Stapler and sticky tape
- Toy bunny and something to attach the bunny to the carrot with (eg. a pipe-cleaner)
- Black or brown marker
- Elastic for the chinstrap
The how-to…

1. Roll the large piece of orange card into a cone to fit your child’s head.
2. Staple the cone to keep it in shape and use sticky tape to seal up the side of the carrot.
3. Trim off the excess card from the base of the cone.
4. Tape on the carrot’s greenery around the inside of the base of the cone. Trim it to your desired length – keeping it nice and short at the front.
5. Staple on the elastic for the chin strap. Tip: Tape the elastic in place before you staple it on. You will find it much easier to position the stapler this way.
6. Draw wobbly lines around the carrot to make it more carrot-like… 6 year olds are excellent at this task.
7. Attach a bunny to the top of the carrot by tying it’s arms together with string or a pipe-cleaner. If the bunny is positioned too high up on the carrot it will be hard for your kid to balance the hat on their head. If that happens push the bunny further down the carrot or find a lighter bunny!
HAT 2: Basket Case

This hat was surprisingly easy to make, it took about 20 minutes. Our hat was made for a girl who loves pink but you could easily go with whatever colour scheme your child loves.
Materials
- Basket
- Collection of plastic or styrofoam eggs in various sizes
- Hot glue gun
- Foam hat (optional)
- Elastic or ribbon for the chinstrap (optional)
- White and yellow plasticine (optional)
The how-to…

1. If you want to use the basket as the hat base attach a ribbon or elastic chinstrap so it stays on. Alternatively, glue the basket onto another hat – this is what we did because it was more comfortable for my 4 year old to wear.
2. Glue each egg on the top of the basket using a hot glue gun. I used a triangular pattern to glue the eggs on which worked well. I also had a bag of mini styrofoam eggs which I used to fill the gaps.
3. Optional: Glue one little chicken right on top of the hat.
4. Optional: If you want a laugh, make a fried egg out of plasticine and glue it on the back of the hat with your hot glue gun.
HAT 3: Happy Chicken Land
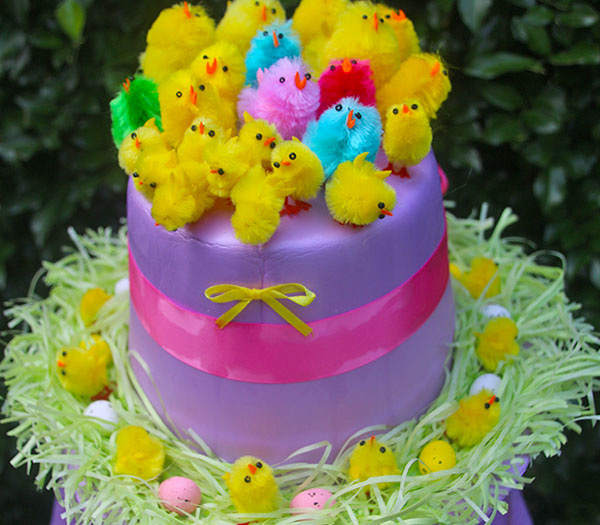
This hat is not ‘a night before’ hat as it needs a lot of PVA glue and the glue will take at least 24 hours to dry if not more.
Materials
- Hat with a rim, we used a cheap foam hat but an old straw hat would be fine
- Easter chicks – all sizes and colours
- Shredded tissue paper
- PVA glue
- Ribbon (optional)
The how-to…
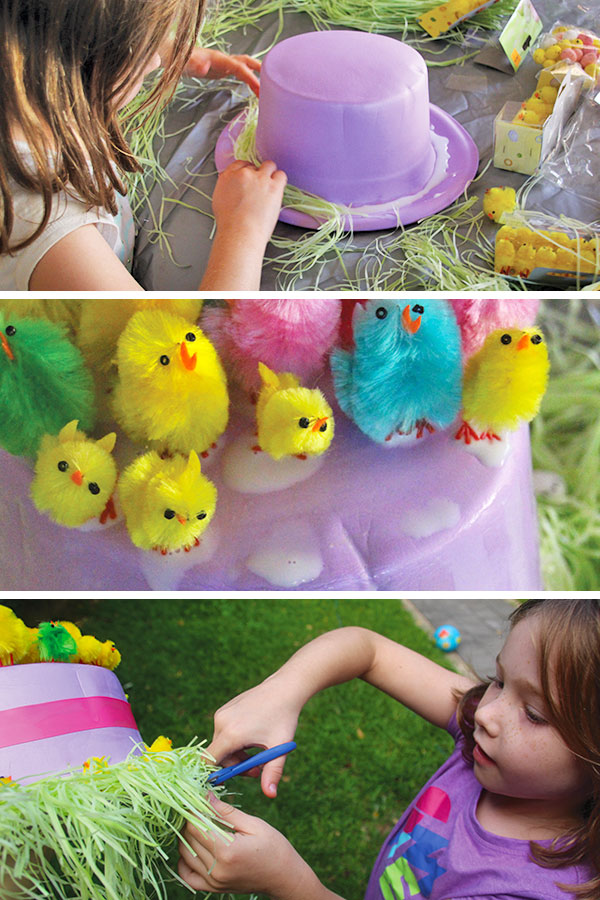
1. Create the nest on the rim of the hat. To do this squeeze glue right round the rim and then layer some shredded paper on top, repeat with another layer of glue, then paper and then glue again until you get a nice thick nest of paper. The shredded paper will look messy at this stage but don’t worry because you can trim it back when the glue is dry.
2. Optional: Add some extras on the nest by gluing down small eggs and/or chickens.
3. Cover the top of your hat with a generous layer of PVA glue. Carefully stand the Easter chicks feet in the glue working from the back to the front of the hat. Small rivulets of glue ran down the side of our hat – we disguised this by gluing a pink ribbon around the hat.
4. Leave the hat to dry.
5. Trim off excess shredded paper so you have a nice neat edge to your nest.
And there’s more… have a look at these great Easter hat ideas;
- Paper Easter Bonnet from Red Ted Art
- Daffodil Easter Bonnet from Sun Hats & Wellie Boots
- Easter Flower Hat and Easter Crown from At home with Ali
- Easter Bunny Hair-do from Simple as That
- Easy Bunny and Chicken Hats from One Perfect Day
Tell me, what is the best Easter hat you have ever made or seen at a parade?
3 Comments
Comments are closed.