DIY Kid’s Kitchen for under $10 – Part 1
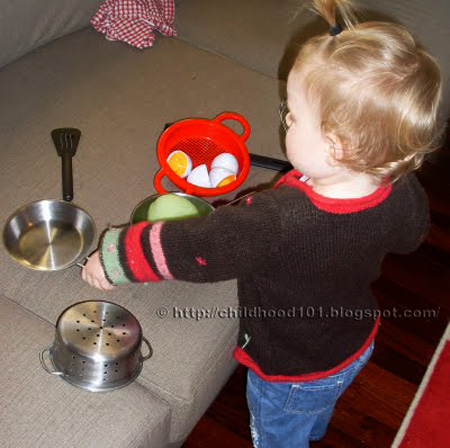
You may remember me posting about whether or not we should buy Immy a wooden play kitchen as she loves role playing, especially cooking. In fact she has been cooking eggs non-stop for about 5 days now, maybe she is in training to be a short order cook!
We have decided that we will buy her a kitchen but we will wait until Christmas to give us a bit more time to save our pennies. In the meantime, I decided to try making a kitchen for her…from cardboard boxes. And as I decided that I didn’t want to spend too much on this temporary kitchen I set myself the challenge of making it for under $10!
How to Make a Kids Kitchen for Under $10
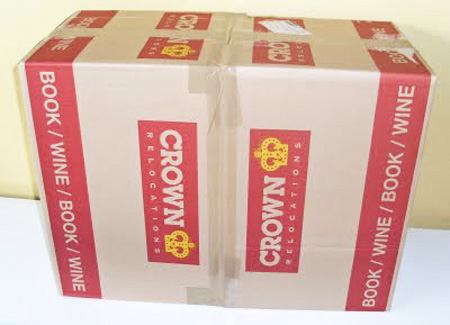
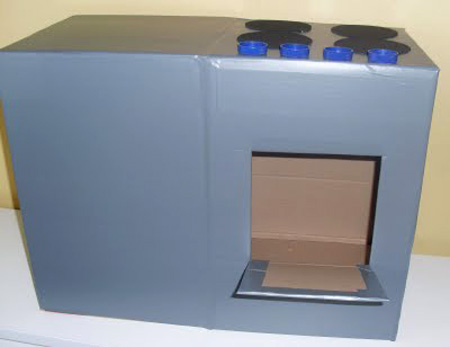
1. Tape two book boxes (or similar) together. I orientated them this way as it was the best height for Immy. I am sure you could use nappy boxes or fruit boxes just as effectively. If you don’t have any at home, ask at your local grocery store. Cost= $0.00
2. Cover boxes with self adhesive paper. I chose a silver/grey but white would work just as well. You could also paint the boxes, I just thought this would cover the images on the boxes better and also give it some more stability.
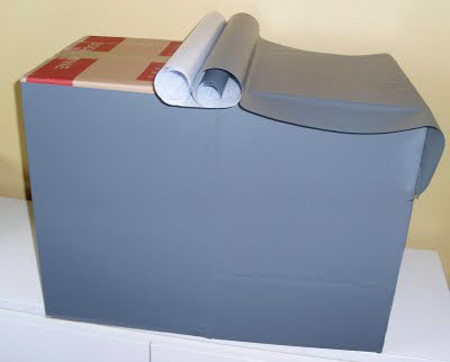
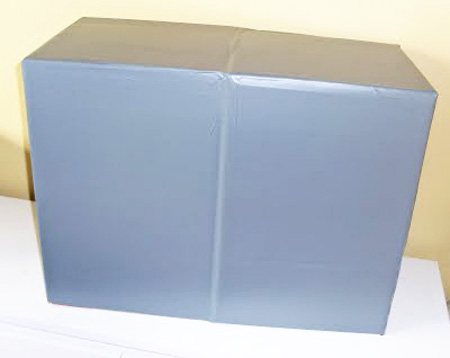
I covered the front and sides first and then the top (I didn’t cover the back). Probably best if you find a friend to help you as this was the trickiest part. Cost=$4.99 for one roll of self adhesive paper
3. Trace around a bowl or small plate four times onto a black foam sheet.
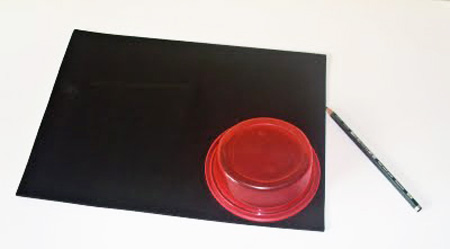
4. Glue foam circles onto top of box to represent stove hotplates. Cost= $4.99 + 0.25c for foam sheet = $5.24.
5. Attach four recycled milk bottle lids to represent knobs on the stove. I originally glued these on but then found that I had some double sided tape that I had forgotton I had so I re-attached them with the tape as I thought this would be more secure.

6. Cut a three sided door to represent the oven door. I used strips of the contact paper around the door and the hole to reinforce it.
7. Attach two recycled lids as knobs for the oven with double sided tape.
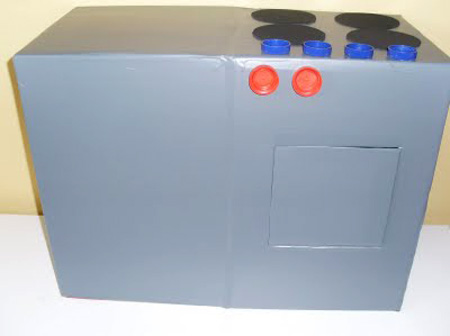
Total cost so far is $5.24. I should add a few cents for the glue and double sided tape so lets say $5.50.
Here is Immy test driving the kitchen stove and oven.

The test play revealed that I need to make a handle for the oven door so that Immy can open it easily. I would also like to get some nuts and bolts so that I can reattach the knobs and they will actually turn, I will have to see if I have enough left in the budget.
The next challenge is to make the second side a sink and cupboard and I have $4.50 left. Now, what will I use for taps? Stay tuned for part 2 of this kitchen makeover.
Part 2 is now complete. Jump over to here to see.
Related Posts:
- DIY Kids: Kitchen Buffet Tutorial
- DIY Kids Car for Under $10
- DIY Kids Hair Salon or Dressing Table
- Emergent Curriculum: What Happens When You Follow a Child’s Interest
So very clever. Looking forward to the kitchen sink!
Wow! That looks fantastic!!!!!
What an awesome idea! 🙂
That is so great! Clever you. I bet she is having so much fun. Sandra x
That is so awesome! Well done!
Awesome idea –
I would have made this but we got a free one from the side of the road 😉 (council cleanup but sans black hotplates…great idea)
Thank you – reminds me of the post I did on boxes .I should go back and check it out (had lots of links not my own ideas LOL)
The preschool make a rocket ship the other day I am inspired now to copy it.
That is so kewl! I wish I thought of things like that…
very cool, I need to do this!
That is SO cool! I can't wait to see Part II!!
Looks great. Immy will have loads of fun playing with her new kitchen. Looking forward to part two.
Fantastic job! I'm all inspired to make a whole kitchen for the cubby now 🙂
What a neat set up. Immy will have hours of fun "cooking" up a storm for you. I can't wait to see what you come up with for the sink.
Could you cut a sponge into strips and then assemble the strips into a cross like shape and use that for taps? You could insert a kebab stick through the sponges and then through the box to keep it in place and also allow for movement of the "tap". Of course you would have to thread something secure on either end of the kebab stick so that no sharp, pointy bit is exposed. Just an idea.
Your omelette looks like mine. Like you, my children are still too young to know the difference – phew! I'll have to perfect this soon as I can't get away with it forever!
Wow! I can't wait to come over and play.
As a suggestion for the sink, perhaps a shoe box or similar (with a bit of depth to it), cut a hole in the middle of the original box and sink the shoe box in. If you used a box with enough depth, you could cut and bend the four sides over the original box to secure it in place.
That looks great. We did buy my daughter a kitchen for $15 from a second hand store and she loved it.
That's great! Excellent job!
That is totally brilliant!! We just moved house and I need to give it a go.
Brilliant! I used to love making DIY toys for my kids when they were younger – so much nicer and more creative that a lot of the plastic that is around in the toy aisles.
All I can say is AMAZING!
Awesome! and a child this age would love this just as much as anything bought from the shops!
Oh wow!!!! That is fantastic!!
I will definitely be asking my partner to bring some boxes home from work so I can have a go at making one.
Genius! I wouldn't buy another after making this. Spend the money on something else. And for "toy foods and stuff" – I had a friend when we were kids whose mom bought the tiny sizes of everything- rinsed them out when empty and viola- she had the best stocked play kitchen EVER. Heck it's 30 years later and I still remember it. 🙂
you should look here..its probably more like $15 to $20..but I bet it lasts longer
http://outofthecrayonbox.blogspot.com/2009/07/dyi-simple-blue-kitchen-directions.html
If you can't find nuts and bolts, split pins should work to attach knobs that swivel .
The kitchen is amazing, I am planning to try and make one myself, but I don't know where I can get contact paper for so cheap?
I can’t get through to see part 2! There’s a bug in the matrix!
Hi Christine, I love this project and have had it in mind since first reading it before my little one was even born! Now she’s 18 months old and I just scored a perfect box to make the kitchen. I just wondered where you bought the self-adhesive paper from? I only ever see it in the shops at the beginning of the school year, and usually in funky patterns or commercial designs (Dora, Cars etc).
Thanks for your help.
Kylie
İ loved.
Very creative.
This would be even less than $5 to make if you buy the adhesive paper, foam, etc. at the dollar store.
What a great idea. My daughter loves to pretend to cook, but honestly, I don’t want to spend a lot of money buying her one of those plastic stoves or kitchens. Thanks for the idea.