Homemade Air Dry Modelling Clay Recipe
My girls love sculpting with plasticine and clay and I have wanted to try making a homemade, air dry clay for ages now. This Air Dry White Clay Recipe is quick and easy to make – in fact, tweens or teens could pretty much manage it on their own. It is suitable for all sorts of different projects – you could try making clay pendants like we did or use this idea as a simple jumping off point for your own creative fun.
Homemade Air Dry White Clay Recipe
You will need:
- Baking Soda/ Bi-Carb Soda
- Corn Starch/ Cornflour
- Water
To make:
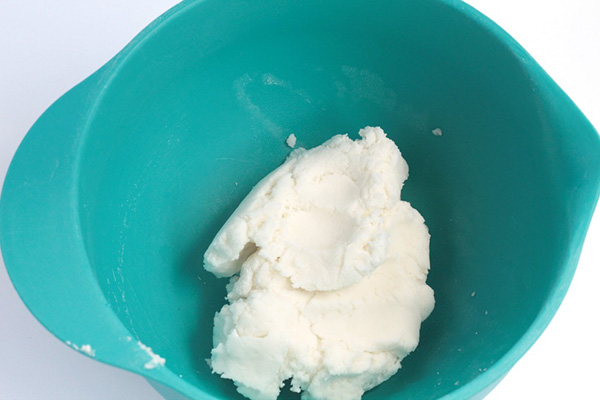
1. Mix 1/2 a cup of baking soda/bi-carb and 1/4 cup of corn starch/cornflour in a small pan. Add 1/3 of a cup of water.
2. Heat on the stove until boiling. The mixture wills soon form a mashed potato/play dough texture. When this happens, it is done.
3. Knead the dough until it is cool. The more you knead it, the softer the final dough will be.
After creating with the clay, store any remaining clay in an airtight container for later use.
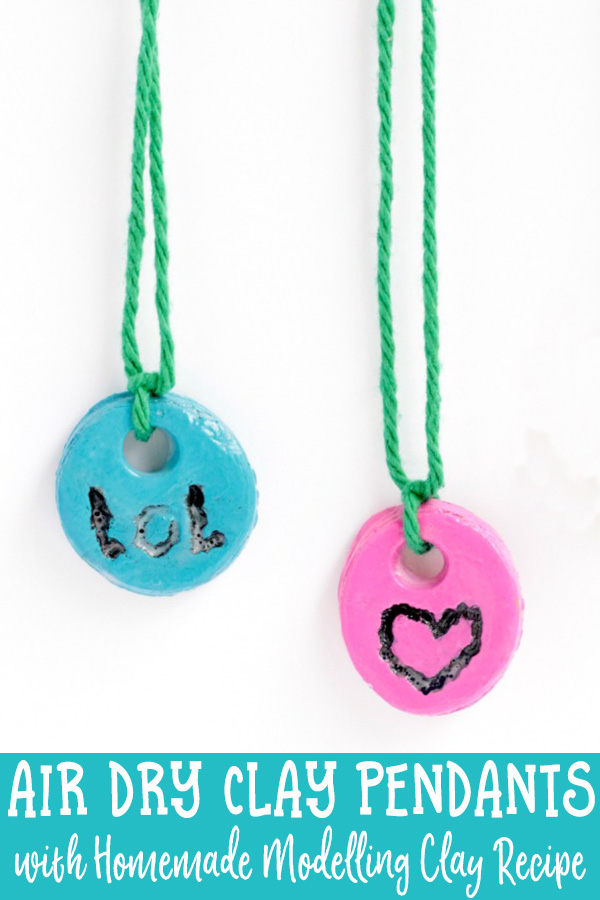
Make Your Own Air Dry Clay Pendants
You will need:
- A batch of air dry, white clay
- Cuticle stick or small letter stamps (we like these ones)
- Rolling pin
- Small circle cookie cutter
- Drinking straws
- Paintbrush
- Dish soap
- Paper towel
- Acrylic paint
- Acrylic sealer
- Yarn or string
- Scissors
To make the pendants:
1. Roll out the dough to about 1/3 of an inch thick. Use your cookie cutter to cut out circles from the dough that are about 3-4cm/1 -1 1/2 inches across (we used the top from a Popsicle mould).
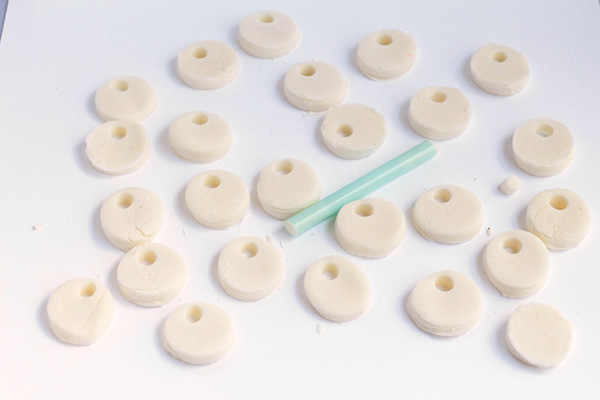
2. Use the end of a drinking straw to poke a hole in one side of each circle so it can be attached as a pendant.
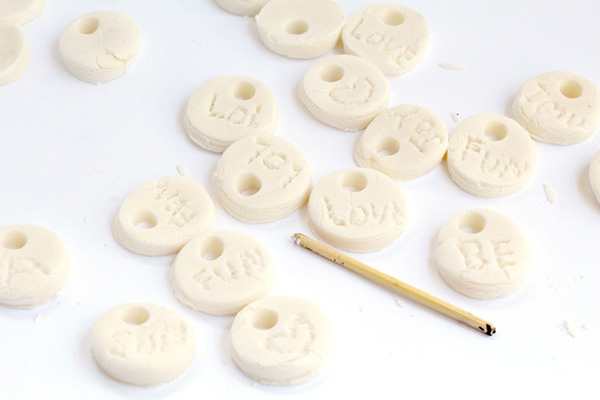
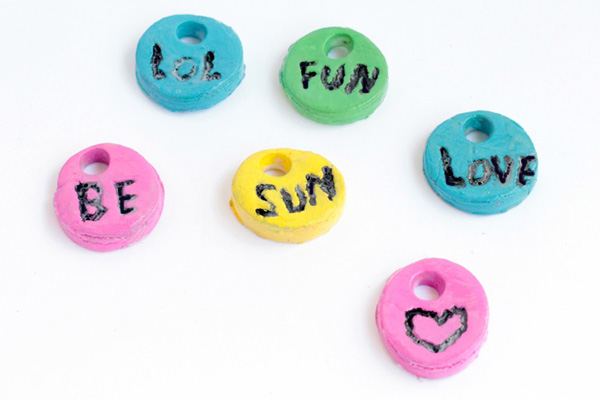
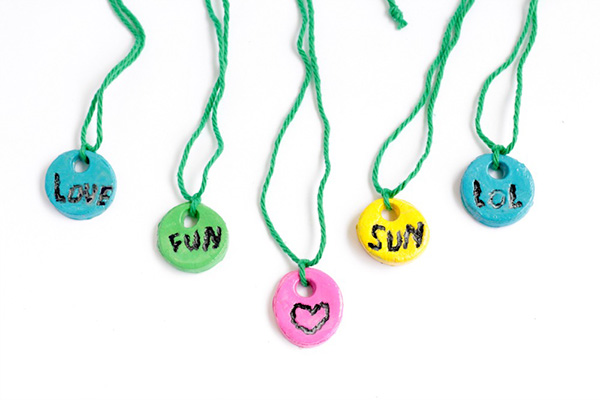
3. Use small letter stamps or a cuticle stick to stamp words and shapes into each pendant. We included fun words like “fun” “joy” “love” and so on.
4. Let the clay dry overnight.
5. The next day, make a mixture of black paint, water, and dish soap with one part of each. Dab this over the pendants to fill the inside of the stamped letters. The runnier paint is easier to get inside the prints. Dab excess paint away with a paper towel and let dry.
6. Paint the top of the pendants with your chosen colour. When you paint over the letters, make sure there is just a tiny bit of paint on the brush. Drag the brush lightly over the letters, rather than pointing the brush down so that the coloured paint does not cover the black paint. Let dry.
7. Seal with acrylic sealer and let dry (it usually takes a couple of hours).
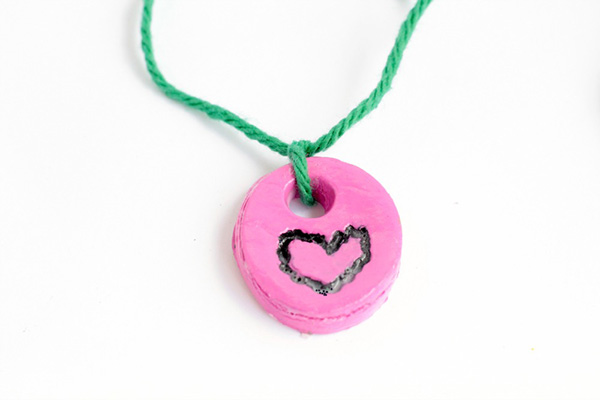
8. Thread a piece of string or yarn through each pendant and tie with a square knot. Tie the ends of the strings together, and your necklaces are complete!
We got it out of the pot fine but when we started kneeding it it crumbled,did that happen?