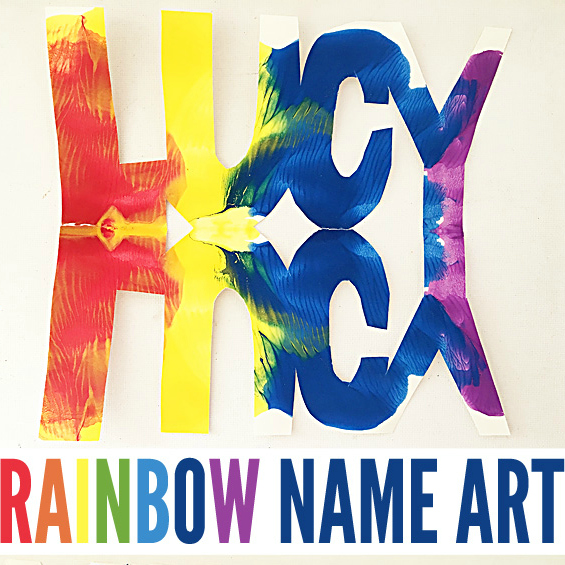
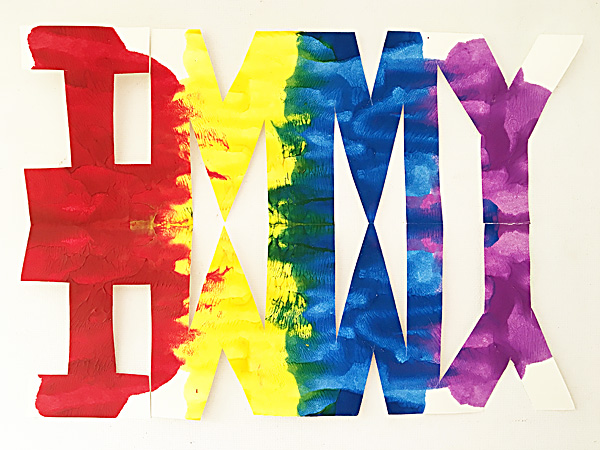
Name Art Rainbows: Kids Art Ideas
Given how popular our Name Snowflakes were at Christmas time, today we are excited to share our latest cool kids art project – these super colourful Name Art Rainbows!
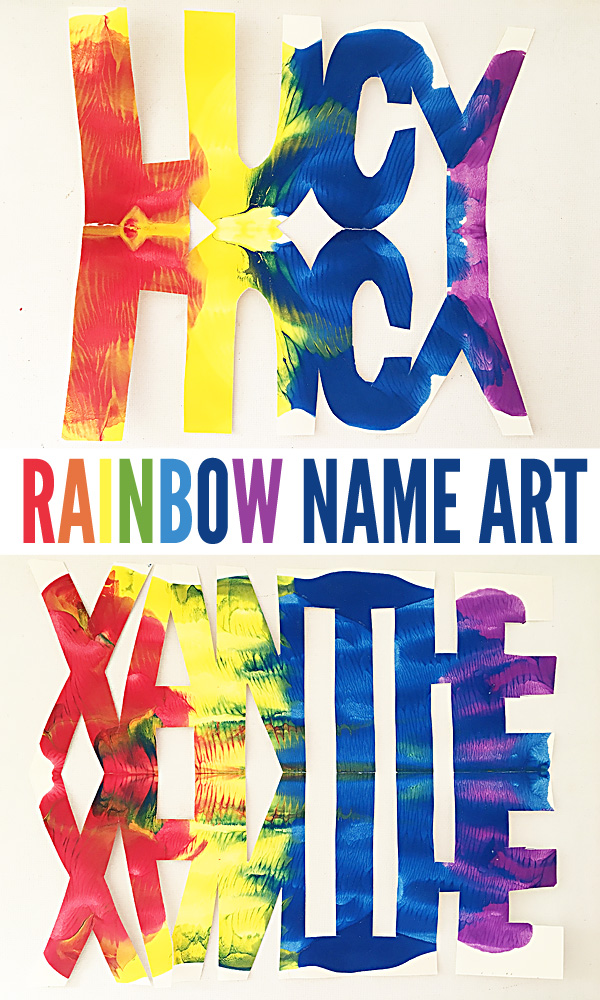
I love that this project combines art with a little math, some fine motor work and a good dose of experimentation too. And the result – a gorgeous and totally unique rainbow. No two are alike!
How to Make a Name Art Rainbow
You will need:
- Thick, white painting paper
- Child friendly acrylic paints in your choice of rainbow colours
- Lead pencil
- Scissors
To make:
1. Start with your paper in a landscape position and fold it in half along the long side (see below).
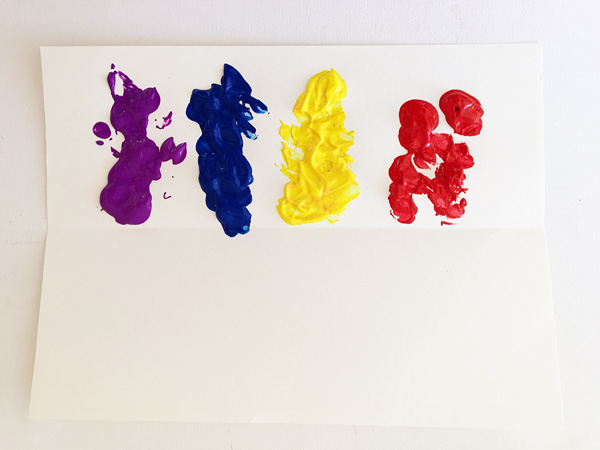
2. Spoon small dabs of paint onto the top half of the paper. We used red, yellow, blue and purple to achieve a rainbow like effect.
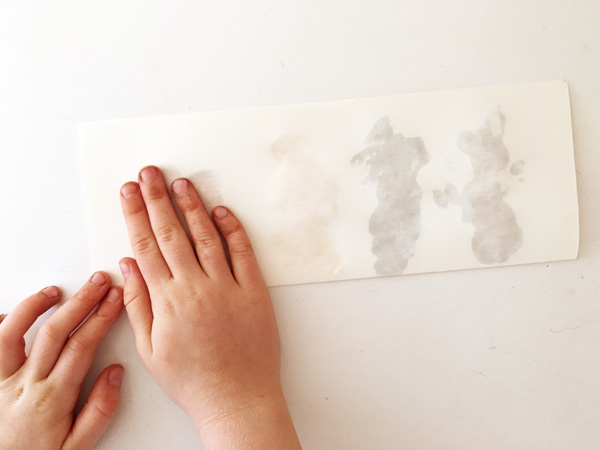
3. Fold the bottom half of the paper up and gently smooth and rub the paper with your fingers so the colours combine. Try to smooth the colours out to the edges of the paper so as much of the white surface as possible is covered. You might find a little oozes out of the sides of the paper.
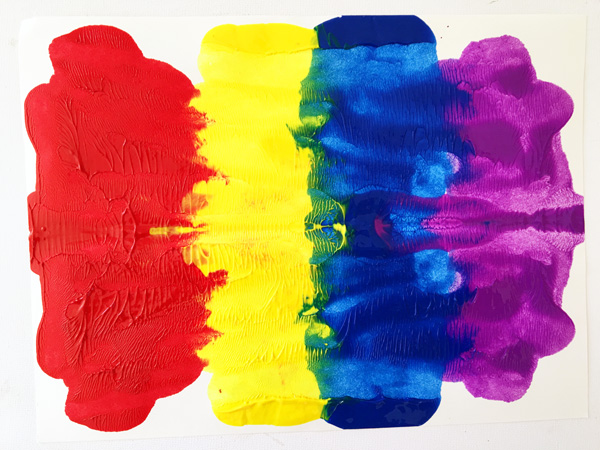
4. Open your paper and set aside to dry.
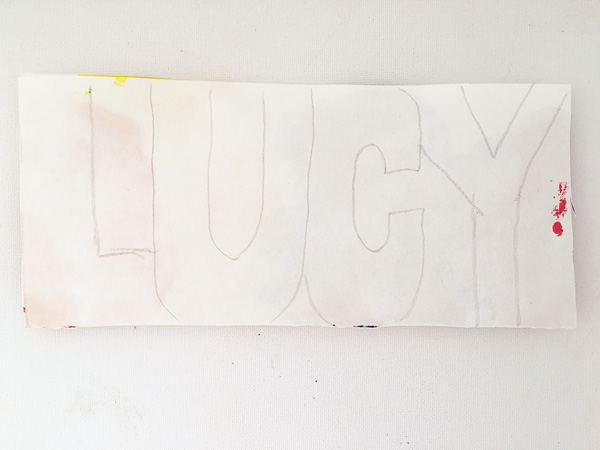
5. While the paint dries you might like to take some scrap paper and practise writing your name in block or bubble letters. Play around with combinations of upper and lowercase letters, different styles of lettering and varying the spacing of your letters – being careful to ensure that each letter touches both the top and bottom of the edges of the paper. You also want each letter to touch the ones alongside it at least one point, don’t leave a space between each one. You might find it easier if you first measure your paper and divide it into equally sized spaces, one for each letter of your name.
Once the paint is completely dry, re-fold your paper along the original crease and transfer your favourite lettering combination onto the outside of your rainbow paper.
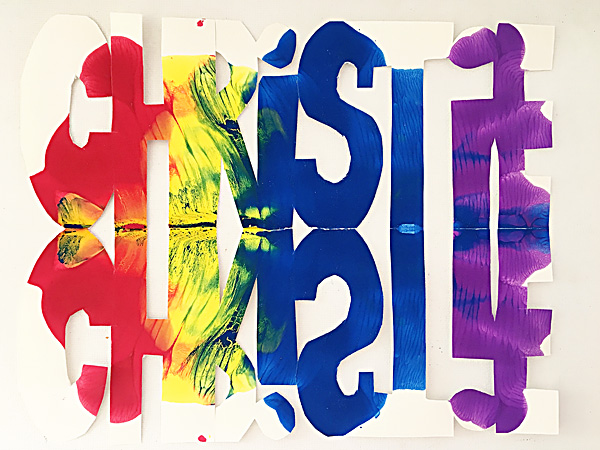
6. Cut the non-letter spaces away, being careful to not cut all the way between two letters. You might have to get creative with letters that need a hole in the middle (like d and p), we cut neatly up, down or across into that part of the letter shape and then cut around it. You can always tape these closed again on the reverse side.
7. Once you’re cutting is done, unfold your snowflake. Ta-da! Magic!
Have fun making rainbow names for each member of your family or make them with your friends on your next playdate.
Looking for colour inspired fun for school aged kids? Check out Kaleidoscope!
This is STEM, art and literacy like you’ve never seen it before – dressed up in all the colours of the rainbow!
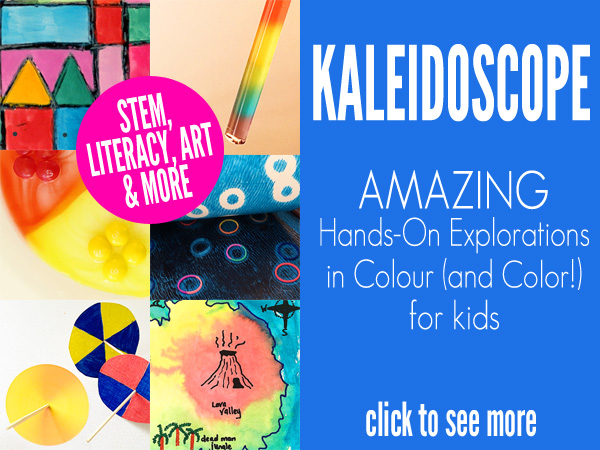
Kaleidoscope: Hands-On Explorations in Colour (and Color!) includes 25 awe-inspiring projects that integrate learning across a range of subject areas. It’s a fabulous resource for teachers, parents, camp organisers, youth and community group leaders, homeschoolers, out of school care educators and more. Pop over to find out more.