Homemade Christmas Ornaments: Plaster of Paris Decorations
A simple Christmas ornament to make with toddlers and preschoolers.
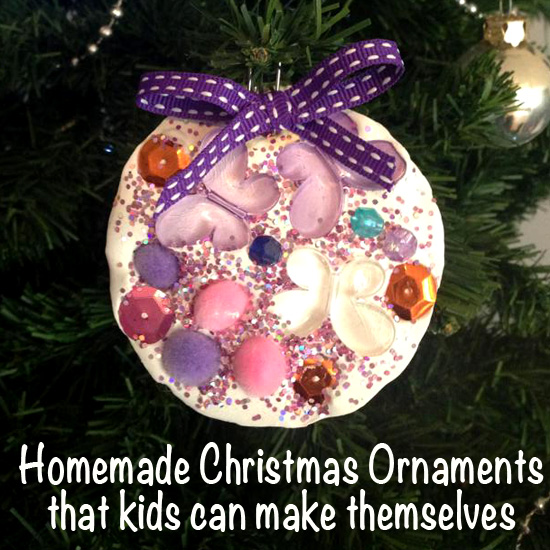
At five and a half, Immy is really getting into the spirit of Christmas this year and this project was completely inspired by her own ideas. She came to me with a collection of beads, sequins, buttons and other small items that she had found left over from an art project and asked if we could make ornaments with them. We talked through some project ideas and settled on plaster of paris as the base for our ornament. I think plaster of paris is so essentially ‘childhood;’ it makes me smile as I think of precious, primary school craft projects! Which is perfect for this project, as Immy was in charge of the whole process, I assumed the role of resource manager and assistant.
Homemade Christmas Ornaments with Plaster of Paris
You will need:
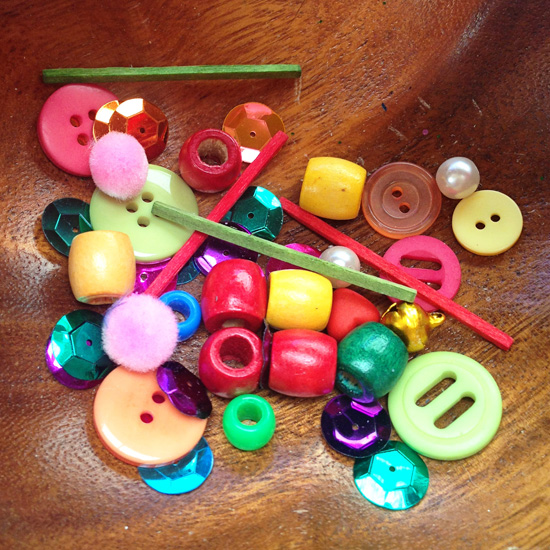
- A collection of small objects: buttons, beads, sequins, pom poms, matchsticks, bells, etc
- Glitter (optional)
- Plaster of paris
- Paper clip
- A large plastic lid
- Petroleum jelly
- Plasticine (modelling clay)
- Small length or ribbon
- Matt craft spray/sealant (optional)
- Plastic mess mat or tablecloth to work upon
To make:
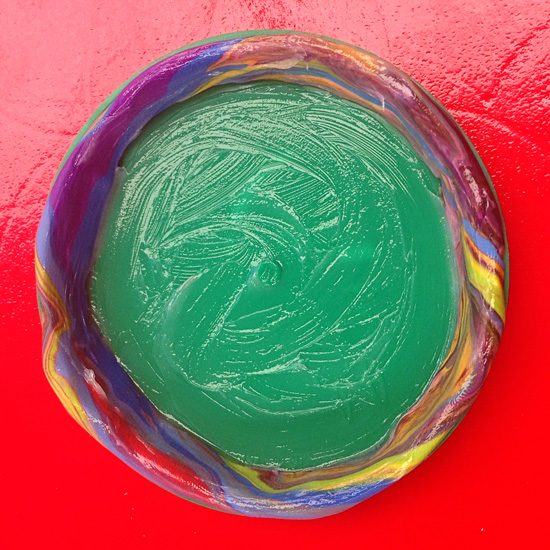
1. Roll a thin snake from the plasticine and line the inside of the rim of your plastic lid. This will stop your ornament from becoming stuck under the lip or in the thread of your lid.
2. Use your finger to spread a thin layer of petroleum jelly to cover the inside of the lid and the plasticine.
3, Mix up a small quantity of plaster of paris according to the directions supplied. Be careful to not make it too thin. We mixed ours in a disposable plastic cup with a pop stick so that both could be thrown away when we were finished. Pour into the lid.
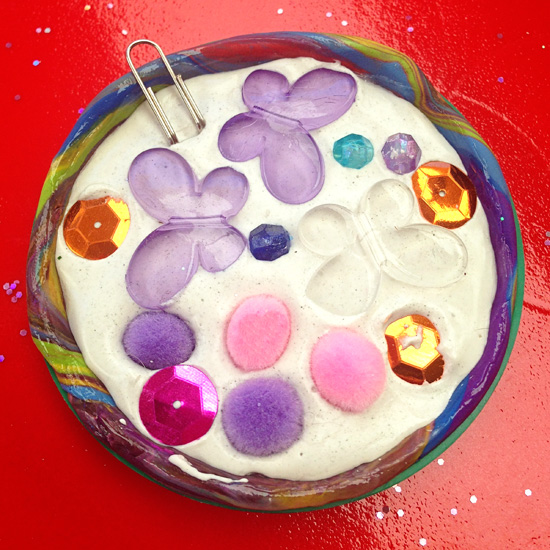
4. Press a selection of small objects gently into the plaster of paris.
5. Gently bend the paper clip in half to an angle of approximately 60 degrees. Gently push one end into the plaster of paris. This will form the hanger for your ornament.
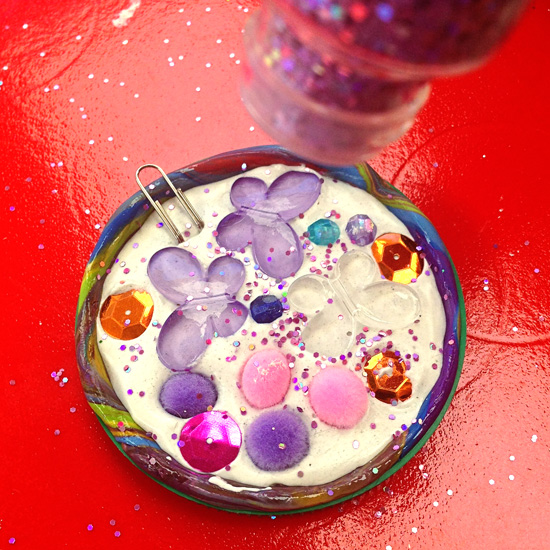
6. (Optional) Sprinkle with glitter (Bonus tip: work outside if you don’t like glitter mess!)
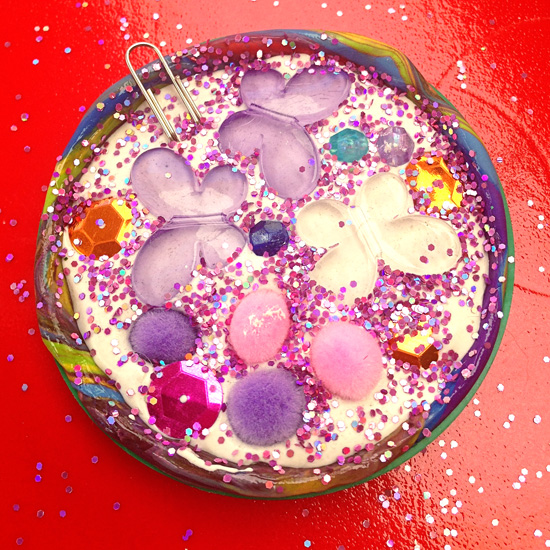
7. Allow to fully dry according to the supplied plaster of paris directions. Remove from lid once dry. Remove plasticine
8. (Optional) Lightly spray with matt craft spray to set glitter.
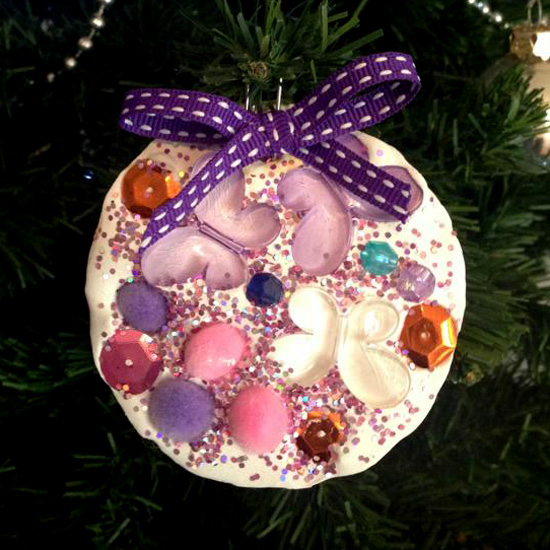
9. Tie a short length of ribbon in a complementary colour around the base of the paper clip.
10. Don’t forget to write the child’s name and the date on the rear of the ornament. Hang on your tree and enjoy for many Christmas’ to come!
Related Posts
- 8 Christmas Decorations to Make With Kids
- 7 Tips for Decorating Your Family Christmas Tree
- Homemade Christmas Decorations: Heart Felt Baubles
Christie that is so beautiful. You are making me wish we’d spent Christmases at home when I was a child. We never had a Christmas tree or any decorations as we would be away. I can now live what I missed through your posts. Don’t get me wrong we had a wonderful holiday at Mandurah for many years from when I was about 8 and before that I have very little memory of Christmas at all. That seems so strange but I always got nice gifts with new pennies in the bottom of my Christmas stocking and lots of books.
My son Andrew and I were looking at your website tonight. He is 7 years old and wanted me to tell you that this project is “interesting, awesome, and cool.” He is looking forward to doing this activity and making gifts for his grandparents. Thank you for all of the wonderful ideas you share with us!