DIY Kids: Dress Up Wardrobe
This project has been on my to do list since forever, well actually, since some time in February after I gave Immy a collection of dress ups for her birthday. The dress ups previously lived in an ‘always-very-messy’ basket but now they have a new home which makes it a whole lot easier to get to the dress ups and makes the play experience a whole lot more fun.
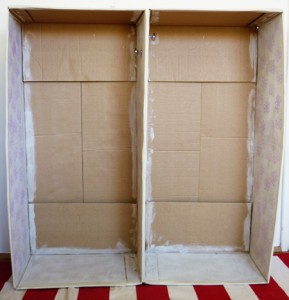
1. Select a large cardboard box (ours was 60cms x 45cm x 98cms), it should be thick, sturdy card.
2. Cut your box in half so that you form two cavities for the wardrobe, this will give it strength and an additional surface to attach the knobs or hooks to. I only cut the box through on three sides, scoring the fourth side with a knife so that it would fold back on itself.


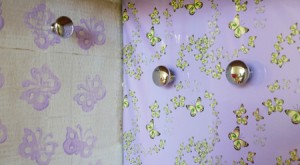
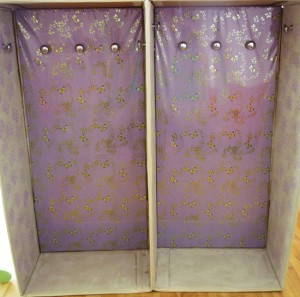
5. Decide where you will position your knobs or hooks (I used a set of 10 cupboard knobs which were on sale at the hardware store) and screw them through the layers of card into position. You will most probably need to buy shorter screws for your knobs as you are only screwing through cardboard, not thicker wooden cupboards or drawers. I made holes through the cardboard first with a small screwdriver.


Related Posts
- DIY Kids Tabletop Puppet Theatre
- DIY Kids: Ice Cream Shop
- DIY Kids Kitchen for under $10
- DIY Kids: Make your own peekaboo travel game
- Making our wooden sandpit


I am speechless Christie, this is such a thoughtful, fun and stylish gift. ABSOLUTELY divine. I wonder where I could get a box like that… maybe Harvey Norman or similar?
What a fabulous, inexpensive idea! I've been thinking for weeks what I can do for my kids dress-ups. They play with them more than any other toys, and I really want a spot that they can have them within easy reach– this looks perfect. Thank you!
That's fantastic! You are so creative!
i love it! great work! Aldi is really good for boxes in lots of different sizes, etc and they dont mind you dragging them away at all!
Thank you everyone 🙂
Sarah, I would think Harvey Norman would be a good option. Our box was from a bar stool, my Mum and Dad have recently renovated their kitchen so we have quite a collection of cardboard in the garage!
Thank you so much for the awesome idea 🙂 My boys have SO many dress ups and they're getting more for Christmas. I was beginning to worry about where they were going to go as the wardrobe is now full. But thanks to you I know exactly where they are going 🙂
This is fantastic!
And looks so beautiful!
I love this so much, I was only thinking last week that there had to be a better storage system for our dress ups than the tubs they are in now. The kids can never find what they want without dumping everything onto the ground and making a massive mess, Im definitely going to make one of these – it looks awesome!!
Great idea Christie, it looks fantastic and I bet Immy just loves it 🙂
I love this. I recently made my boys a dress up area. I just hung an old hat rack of my husbands. But the dress ups keep falling off. I think I need to sew in some loops. Thanks for the tips.
This is brilliant, thanks so much! I have recently come upon your website and am so in awe of it. Thanks thanks thanks x
I often have customers and friends asking for tips for putting dress up clothes out for children, this is such a quick and easy way, older children could may be paint or stick pictures on the box too 🙂
I LOVE this idea…I am actually going to use a wardrobe moving box since it already has a clothing rod in it and I will cut the front to open and close like a door so I can hide the mess and I will use spray adhesive to cover the entire box with some cute girlie fabric!! Great Idea!
Lisa, i has the exact same idea and then I saw your comment. How did it work out using the wardrobe box? Did you add any knobs for hanging other items like necklaces? Thanks