Make Your Own Felt Tic Tac Toe Game
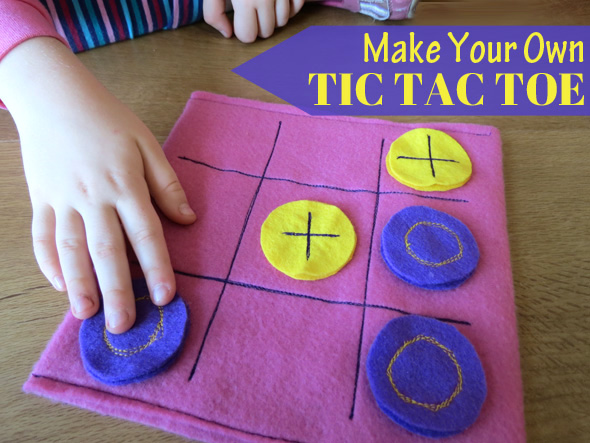
At five years of age Immy has recently discovered the joy in a game of Tic Tac Toe (otherwise known as Noughts and Crosses). This felt version of the game was super easy to make and given that we have already played with it many, many times I know that it is a fabulous addition to our games cupboard. As it takes up next to no space, I look forward to packing it next time we are travel or head out to dinner as a family.
Felt Tic Tac Toe Tutorial
You will need:
- One length of felt 47cm x 20cm for the game base/storage pocket
- Two contrasting colours of felt, enough of each to cut out 12-16 small circles (I allowed for a few extra game pieces of each colour)
- Cotton in contrasting colours to your felt
- Sewing machine
- Iron on adhesive for fabric (I used Heat n Bond)
- Two velcro dots
To make:

1. To make the playing pieces cut 12-16 small circles from each colour of felt. I used a circle template to create circles 5cm in diameter. Two circles are used for each playing piece.
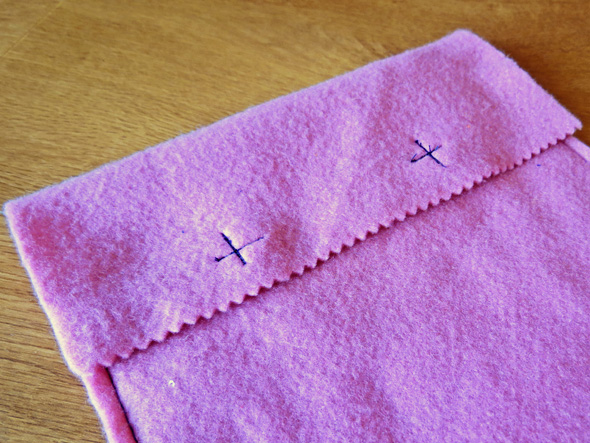
2. On six (to eight, depending upon how many spare game pieces you are making) of the felt circles of one colour, machine stitch a cross using a contrasting coloured cotton. Mine were sewn free form (which worked better for the crosses then for the noughts) but you could draw your shapes onto the felt first. I stitched over each line three times. On six of the felt circles of the other colour, machine stitch a circle using a contrasting coloured cotton.

3. For each playing piece, cut a circle out of the iron on adhesive. Follow the manufacturer’s directions to join one stitched playing piece to one blank circle piece. This will strengthen the playing pieces.
4. To create the game board and storage pocket, mark out the playing grid directly onto the felt (this will be on the inside of the final product). I first divided my length of felt into three sections – the first two at 19 1/2 cms wide and the third 8cms (this section will form the flap that is folded over to seal the storage pocket).
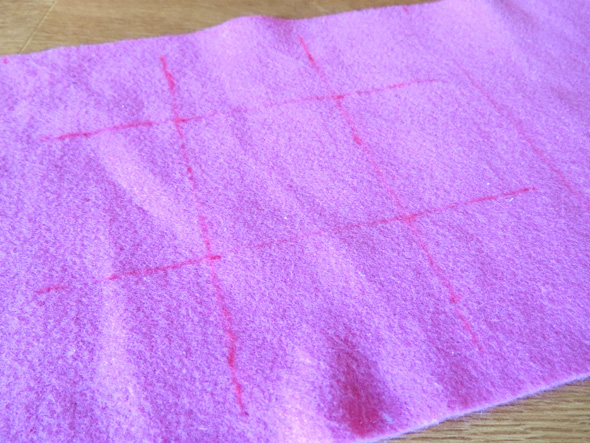
Draw the game board in the middle section. My grid lines were each 16 1/2 cms long and sat 7cms apart.
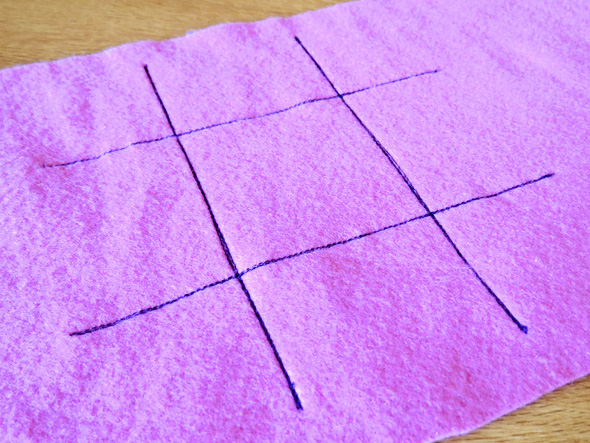
5. Machine stitch over the lines marked on your game board with a contrasting coloured cotton. I stitched over each line three times.
6. Fold the large side section over the middle section. Pin each side and machine stitch (with a 1/2cm seam allowance) each side. This forms a pocket for storing the playing pieces when they are not in use.
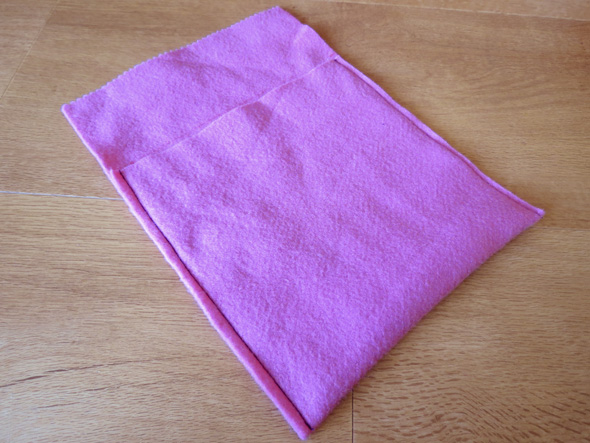
7. Fold the top section down to form a flap that will close the storage pocket. Stitch the two velcro dots in place to secure.
Turn the pocket over and you are ready to play. Enjoy!

If you are looking for more activity ideas or practical suggestions for travelling with kids as we head into school holidays and summer vacation time, be sure to check out my Road Tripping & Family Travel board on Pinterest.
This is a great travel game set up! Especially since it is a pocket for the game pieces too, love it 🙂 Pinning!
All you clever sewing people! You all made me buy a sewing machine because I was missing out on so many cool things… but I’ve not yet had the time to unpack it from the box and learn how to use it! I’d love to make this and it looks easy enough so perhaps it will be one of my first projects. Thanks for sharing. Pinned 🙂
I haven’t thought to play tic tac toe with my kids yet. What a fun way to play! I’m pinning for for future reference 🙂
I’m not great at sewing but even I can manage this, will be adding to my box of travel goodies.
Very cute little set!
Great idea and I love that you used felt.
This would be a cute party gift idea 😉
this is so nifty…I reckon my big girls could have a go at this on their own.
Jack has a little friend who loves sewing. It’s his birthday soon and I was thinking about putting him together a little sewing project. This would be a great one. The felt’s good so he won’t have to hem it…yep I like it 🙂 He’ll love it 🙂 Done.
Love this little idea Christie! So easy to do and yet it will provide hours of fun especially when travelling. Will have to give it a go!
I pinned this ages ago and a few times actually! I didn’t realise it belonged to you (although I’m not surprised). Love seeing activities made from felt. I’ve only just started exploring it myself. This is a great simple idea that kids would love. Thanks.