How to Make a Worm Farm For Kids
Looking for instructions for making a worm farm for kids? This eco-friendly DIY project is super simple and perfect for introducing children to the superpowers of worms! Plus we’ve included a handy worm farm instruction sheet, some wonderful worm facts and worm research prompts for you to download and print.
Why have a worm farm?
A worm farm is a bit like a compost bin for food waste.
They are great for recycling food scraps. Worms break down this waste to create fertilizer full of the nutrients plants need to grow.
Recycling food scraps using a worm farm also helps to reduce the amount of waste sent to land fill, and it helps to reduce the greenhouse gas emissions that food waste emits as it rots in landfill.
How does it work?
Earthworms eat your food scraps and convert the waste into worm manure – making worm wee and worm castings. When collected, this worm wee and castings can be used to fertilize gardens.
Making a worm farm using free and recycled materials is easy – easy enough that children can do it themselves, with just a little help! It is a wonderful eco-friendly project for school or home.
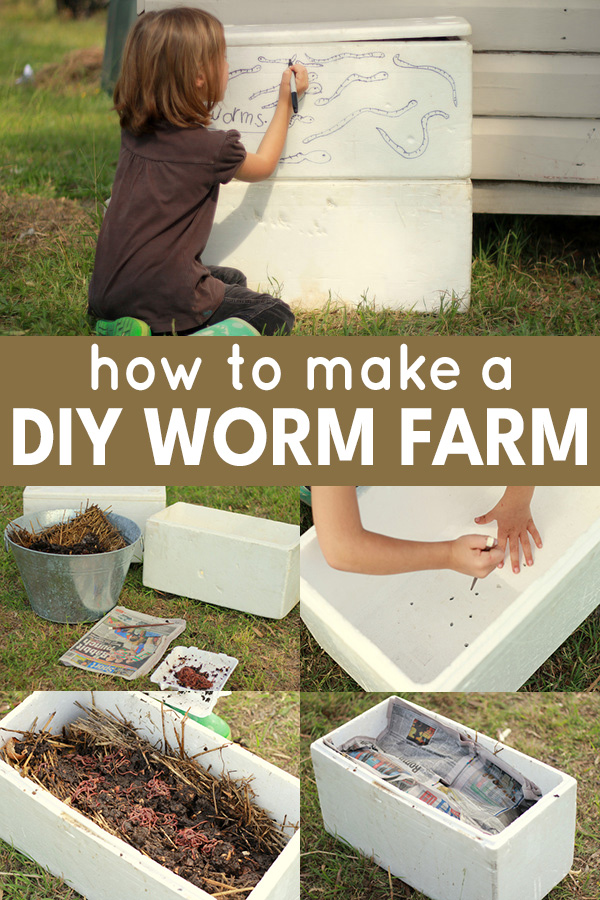
All it takes is a couple of recycled styrofoam boxes, a handful of compost worms and some worm bedding. Within weeks you will be reducing your household waste and producing the BEST fertilizer for your garden!
RELATED: Creating a child friendly garden? Check out this list of safe plants for play spaces.
How to Make a Worm Farm For Kids
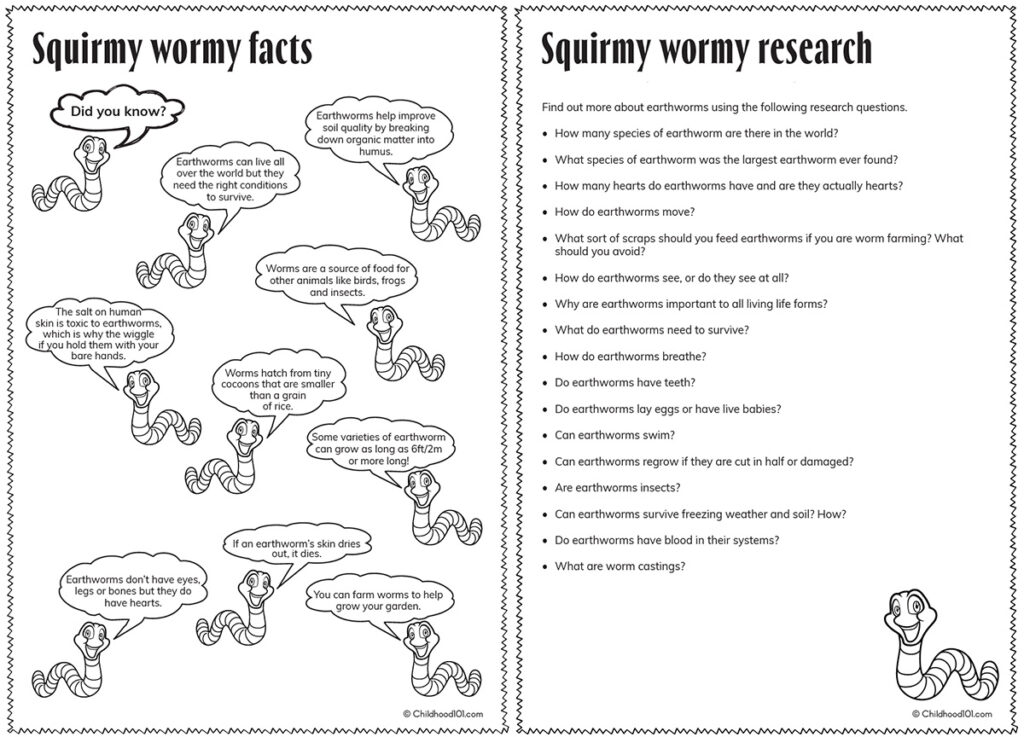
Find a printable version of the following instructions, along with some cool worm facts and worm research prompts for kids at the bottom of this post.
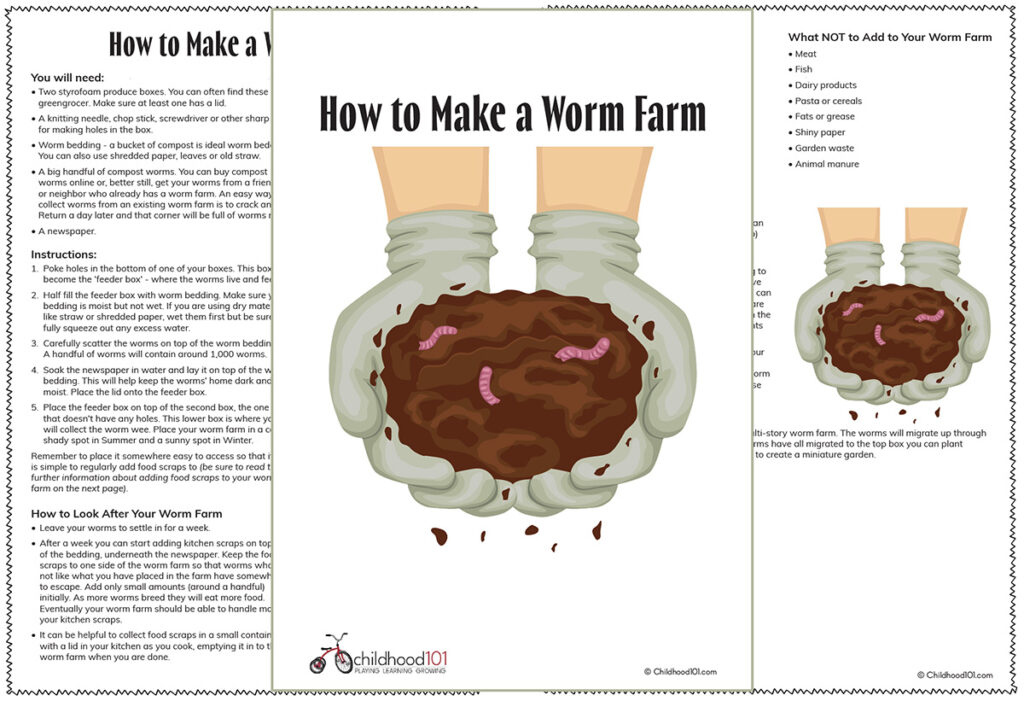
You will need:

- Two styrofoam produce boxes. You can often find these at a greengrocer. Make sure at least one has a lid
- A knitting needle, chop stick, screwdriver or other sharp tool for making holes in the box
- Worm bedding – a bucket of compost is ideal worm bedding. You can also use shredded paper, leaves or old straw
- A big handful of compost worms. You can buy compost worms online or, better still, get your worms from a friend or neighbor who already has a worm farm. An easy way to collect worms from an existing worm farm is to crack an egg in one corner of the worm farm. Return a day later and that corner will be full of worms ready to collect
- A newspaper
Instructions
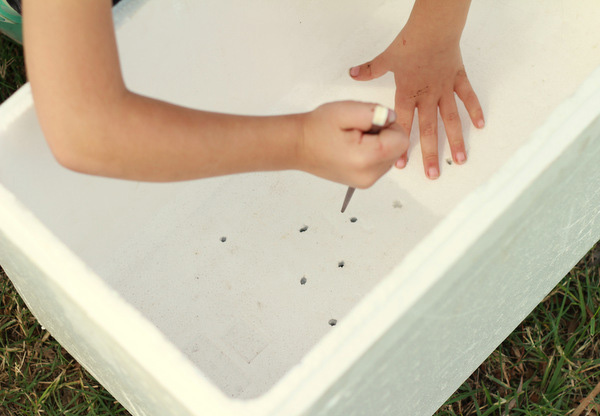
1. Poke holes in the bottom of one of your boxes. This box will become the ‘feeder box’ – where the worms live and feed.
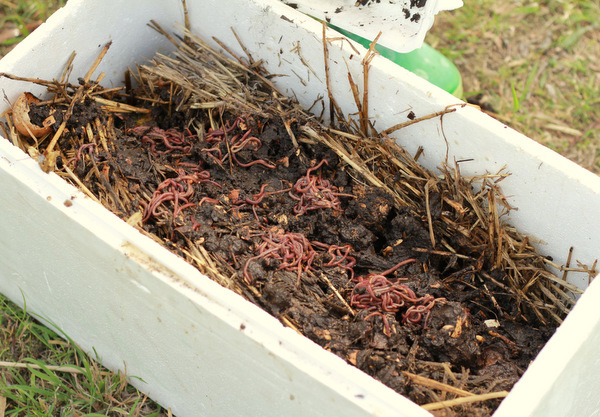
2. Half fill the feeder box with worm bedding. Make sure your bedding is moist but not wet. If you are using dry materials like straw or shredded paper, wet them first but be sure to fully squeeze out any excess water.
3. Carefully scatter the worms on top of the worm bedding. A handful of worms will contain around 1,000 worms.
4. Soak the newspaper in water and lay it on top of the worm bedding. This will help keep the worms’ home dark and moist. Place the lid onto the feeder box.
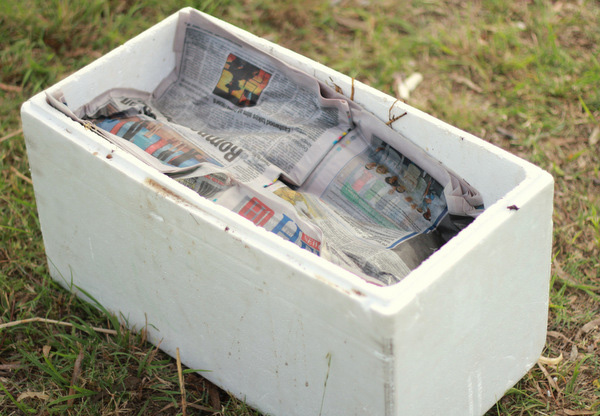
5. Place the feeder box on top of the second box, the one that doesn’t have any holes. This lower box is where you will collect the worm wee. Place your worm farm in a cool, shady spot in Summer and a sunny spot in Winter.
Remember to place it somewhere easy to access so that it is simple to regularly add food scraps to (be sure to read the further information about adding food scraps to your worm farm below).
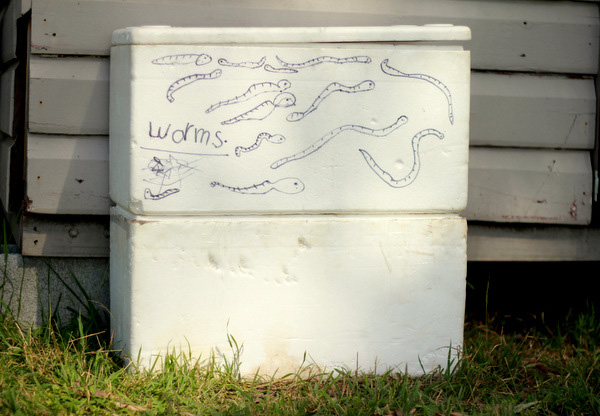
You can now decorate the outside of the worm farm using permanent markers.
How to Look After Your Worm Farm
- Leave your worms to settle in for a week.
- After a week you can start adding kitchen scraps on top of the bedding, underneath the newspaper. Keep the food scraps to one side of the worm farm so that worms who do not like what you have placed in the farm have somewhere to escape. Add only small amounts (around a handful) initially. As more worms breed they will eat more food. Eventually your worm farm should be able to handle most of your kitchen scraps.
- It can be helpful to collect food scraps in a small container with a lid in your kitchen as you cook, emptying it in to the worm farm when you are done.
What to Add to Your Worm Farm
What NOT to Add to Your Worm Farm
- Fruits and vegetables (but not citrus fruits, onions, garlic or capsicum)
- Coffee grounds
- Tea bags
- Bread
- Egg shells
- Shredded plain paper
- Meat
- Fish
- Dairy products
- Pasta or cereals
- Fats or grease
- Shiny paper
- Garden waste
- Animal manure
- Keep the top layer of newspaper damp (remember damp, not wet, a spray bottle can be handy for keeping the newspaper damp) and replace as needed.
- To harvest the worm castings, move all the castings to one side and add fresh bedding to the empty side. Most of the worms will move to the fresh bedding and in a few days you can then remove the castings. Worm castings are a great plant food. Grow seedlings direct in the castings or use it to top dress your pot plants or garden.
- The worm wee is a super plant fertilizer. Pour the worm wee from the bottom box into a watering can or bucket and dilute 1 part worm juice to 20 parts water. It is too strong to use undiluted.
- If you wish, you can eventually increase the size of your worm farm by adding an additional feeder box on top, creating a multi-story worm farm. The worms will migrate up through the holes to the new bedding. After the worms have all migrated to the top box you can plant seedlings directly into the initial feeder box to create a miniature garden.
Printing Your Worm Farm Instruction Sheet
Click here to download.
How to Make a Worm Farm
. Save the PDF to your computer. Open the PDF and print the page you require. When printing, select “Fit to printable area” (or similar) to ensure the page fits with your printer type and local paper size (these have been created at A4 size).
Having trouble accessing or downloading the file? Please try a different internet browser.
Please note: All Childhood 101 printables are for personal use only, you may not use any part of this content for commercial purposes-that includes selling the document, giving it away to promote your business or website, or printing the file to sell. You may not share, loan or redistribute these documents. Teachers may use multiple copies for students in their own classroom.
More Eco Friendly Resources for Kids
We hope you love our eco- and kid- friendly worm farm tutorial and printable. If you are looking for related learning materials be sure to check out the following posts;


That is an awesome tutorial Tricia, and makes it sound so easy. I have heard people say you need to pre-blend your scraps before giving them to the worms, but we just all our excess scraps (excess meaning the ones the chooks won’t eat) into a boring old black compost bin, and it is FULL of worms.
But I do just happen to have two of those produce boxes sitting around, one with a lid and one with out. And that compost bin is just about chockas… So I think this could be a project to do with my seven year old on a weekend soon 🙂
Yes – I’ve heard the same. The smaller the pieces the quicker the worms can digest. If the pieces are too big they rot before the worms can eat them. But we’re the same – the worms only get what the chooks or guinea pigs don’t want so they don’t get too much at once.
Would love to hear how you go if you do make one. Little Eco had loads of fun helping to make ours.
I’ll let you know how it goes 🙂
I love this idea and have been wanting to do a worm farm for ages but not got round to it and worried it wouldn’t cope with the quantity of food scraps we generate. We currently use the bokashi system but find that we fill a bin once a week, mainly fruit/vegetable peelings, not meal leftovers which is much quicker than the suggested three week period. We don’t have enough garden space to bury it as frequently as required. Would the worm farm cope with this quantity of kitchen scraps? Can you put meat scraps in a wormfarm? Do you have any experience of using the bokashi system?
My reply is below Mrs Pelican – for some reason it came up as a general comment rather than reply to you.
Worm farms are best for just a small amount of scraps at once. You could have a few worm farms going at once 🙂
A worm farm would help reduce the amount that goes in your Bokashi bin. I use a mix of compost, worms, chooks and guinea pigs to deal with our scraps. i think having a few options is a good idea.
And meat scraps would be best in your Bokashi bin – they will only attract mice and blow flies to your worm farm.
I haven’t used the Bokashi bin – because I’ve always had outside compost bins. but I do have friends that have one. They look like a nice easy option for when you don’t have space for an outdoor compost bin.
One day our two-year old saw an earthworm on the walkway and was fascinated. (He pronounces them “wums.”) So, I took him over to the loose bricks that lined the front garden and started turning them over one at a time. Many had earthworms under them, which we would watch until they wiggled back into the ground. Now it’s hard to take him out the front door without flipping a brick or two just to let him say hi to the “wums.”
Simple pleasures.
Gwynn
I love this story Gwynn. Thank you for sharing 🙂
Hi Tricia, we made a similar one at Purple Pear Permaculture Playgroup.
http://purplepearorganics.blogspot.com.au/2013/08/produce-no-waste.html