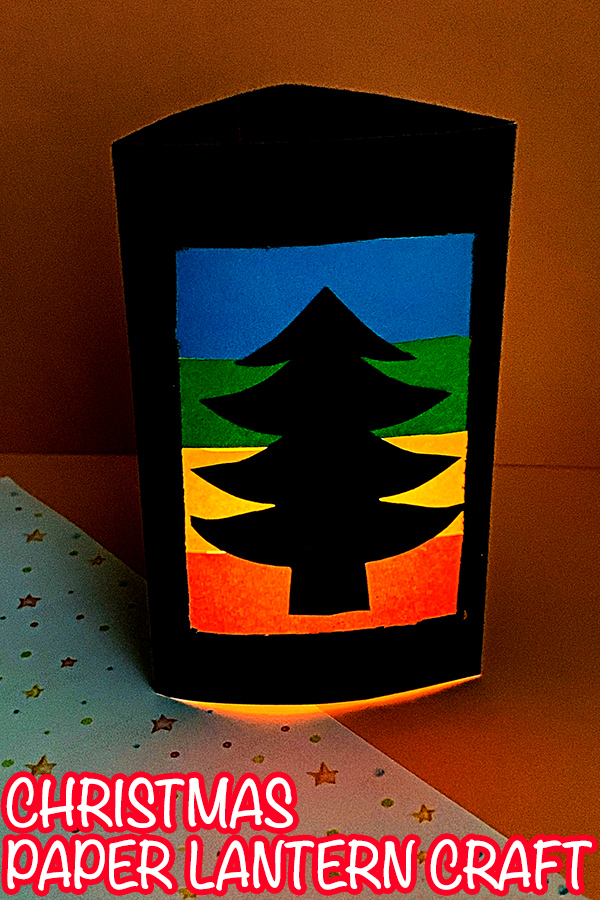
Christmas Tree Paper Lantern
Light up the holidays with this simple Christmas tree paper lantern. A great Christmas craft idea for school age kids in the lead up to Christmas.
Like our Craft Stick Lantern and Holiday Mantlepiece Pop Up Card, this project is great for children in the middle grades.
Christmas Tree Paper Lantern Craft For Kids
You will need:
- Black cardstock
- Coloured tissue paper
- Scissors or craft knife
- Pencil
- Ruler
- Glue
- Battery operated tealight candle
How to Make a Christmas Tree Paper Lantern:
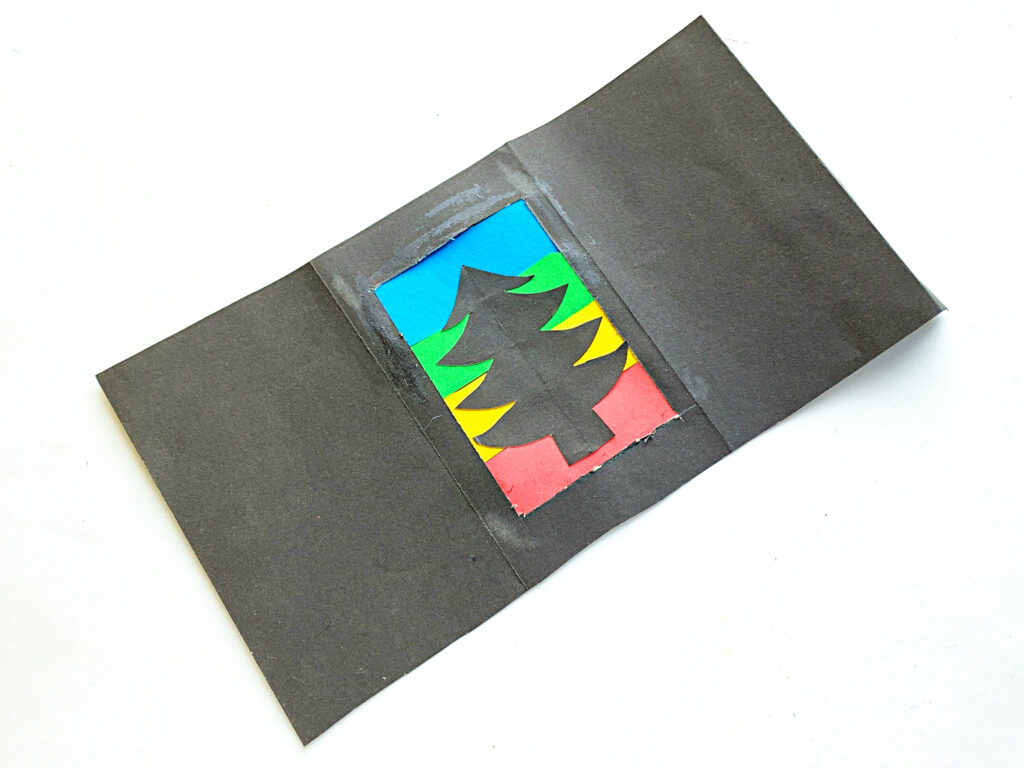
1. Begin with a strip of black cardstock paper cut from an A4 or Letter sized sheet. The strip should be 15cm/6in high. Make a 2cm/1in fold at one end and then fold the remaining length into equal thirds.
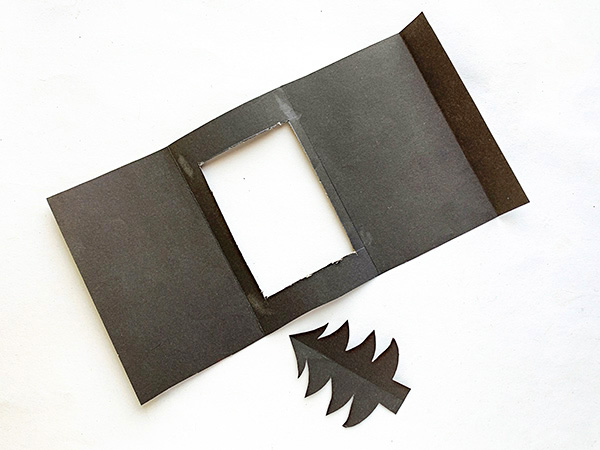
Cut out a rectangular section from the central of the three large, folded areas, leaving a 1cm/0.5in border as a frame. Cut a Christmas tree shape from the removed piece of cardstock.
Tip: Folding the cutaway rectangle of cardboard in half will make it easier to cut out a symmetrical tree. Use a white pencil to sketch out your tree shape before cutting, or cut freestyle.
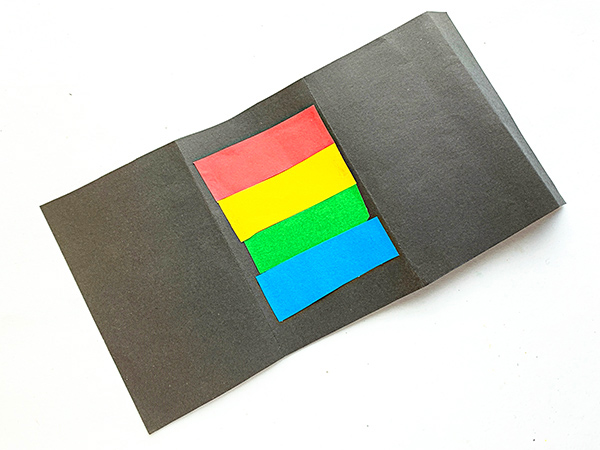
2. Cut out 2cm/1in strips from your choice of coloured tissue paper.

3. Take one strip and glue it across the top of the middle area that was cut away.
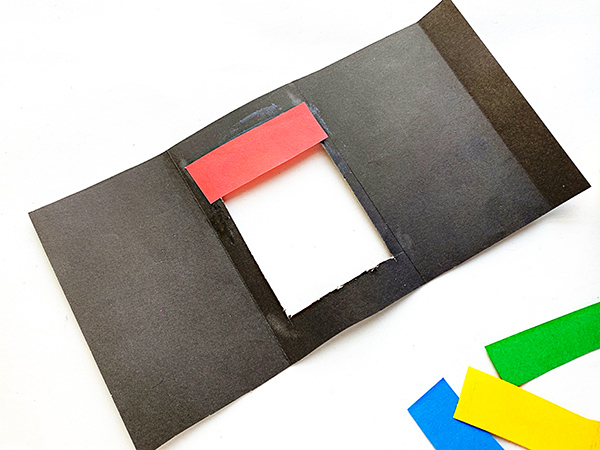
4. Use the remaining strips to fill the entire cutaway rectangular area.
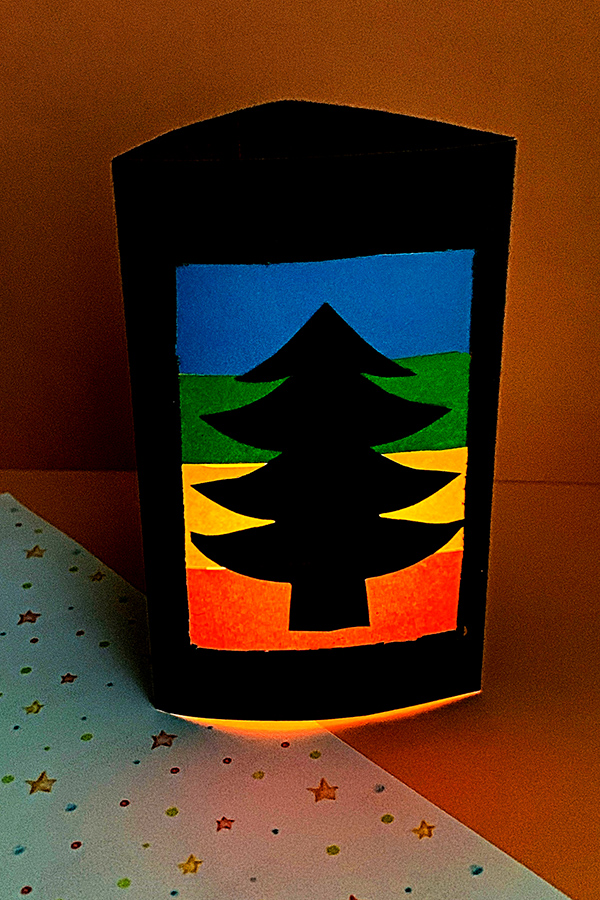
5. Flip the lantern over and glue the pape Christmas tree over the tissue paper strips.
6. Apply glue to the flap created in step one.
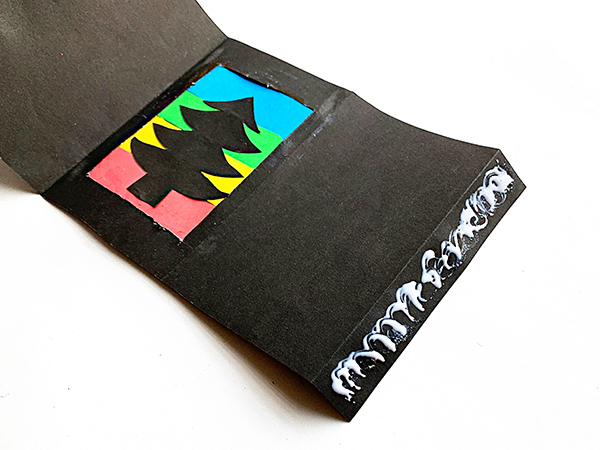
7. Stand the lantern up, forming it into a triangular tube. Secure the flap inside the lantern. Your lantern is now ready to light up.
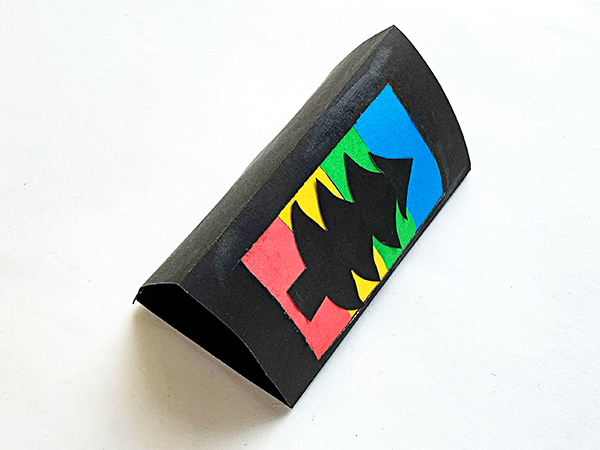
8. Add a battery operated tealight candle and dim the lights to see the full effect.
You may also like;